Easy Homemade Cinnamon Rolls
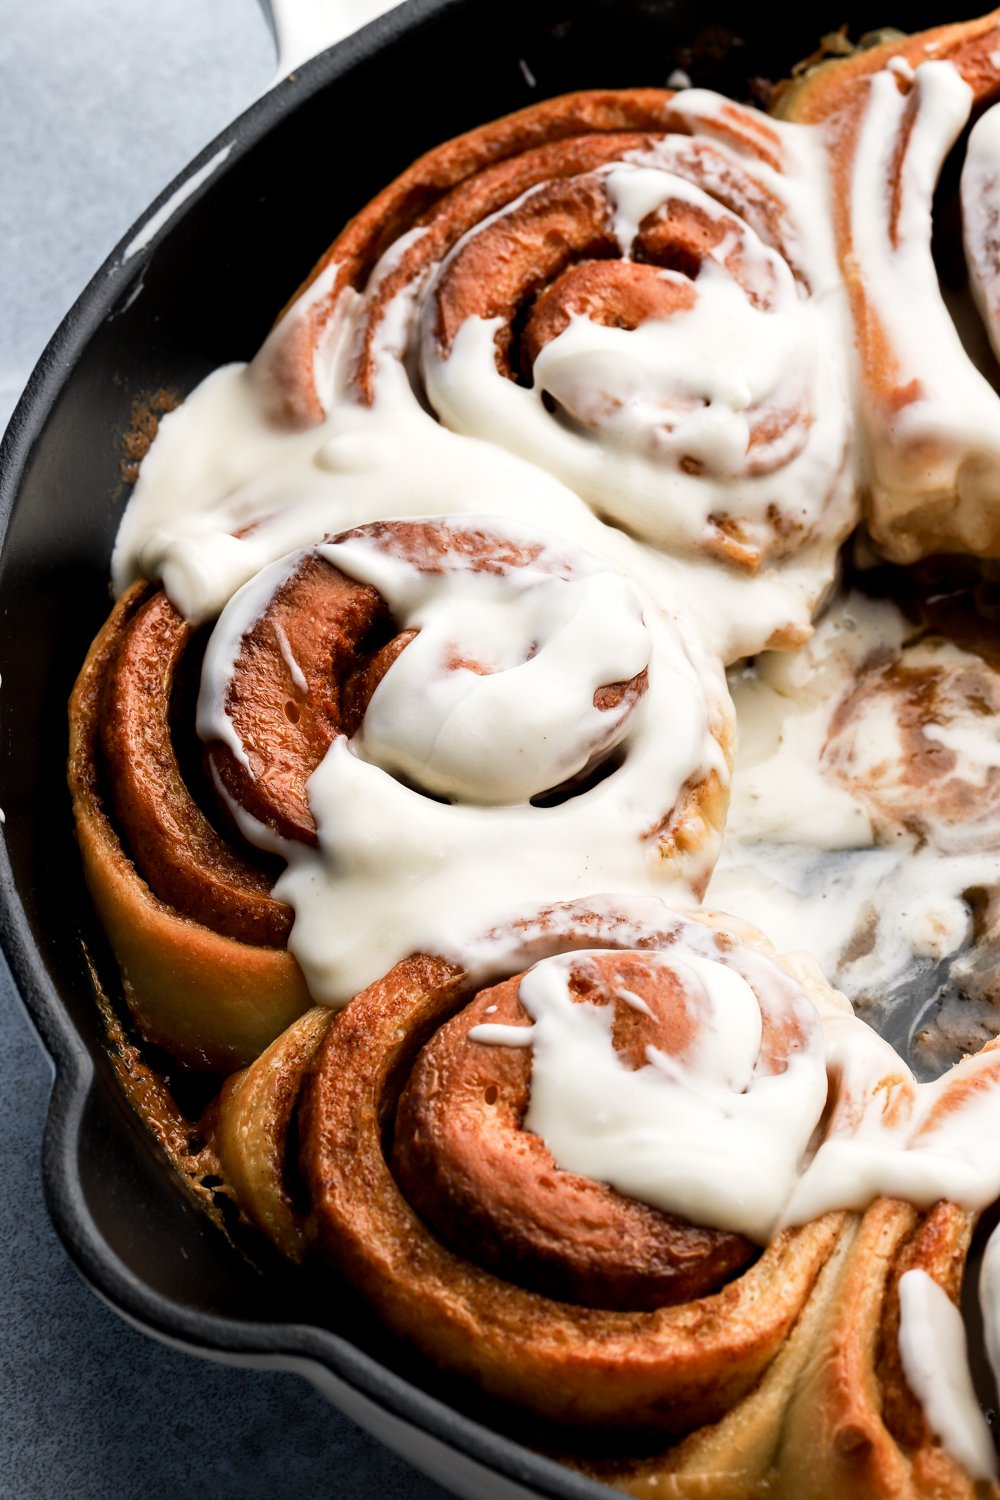
These homemade cinnamon rolls are super fluffy, made with brioche dough, rolled with butter, brown sugar and cinnamon, baked in cream and frosted with cream cheese frosting; perfect for Christmas morning… or like all the time.
This post was updated 12/21/22 with a simplified and fluffier dough and 9/5/2023 with the addition of heavy cream. The variations linked below are not all updated yet but feel free to use this recipe for any of the variations.
Hi friends! Now that my book, Frosted, is mostly finished I wanted to update some of my favorite old recipes. I first published this recipe for brioche cinnamon rolls back in January 2018 and I’ve become quite the cinnamon roll addict since then.
This recipe has been updated several times and I can genuinely say they are MY BEST version.
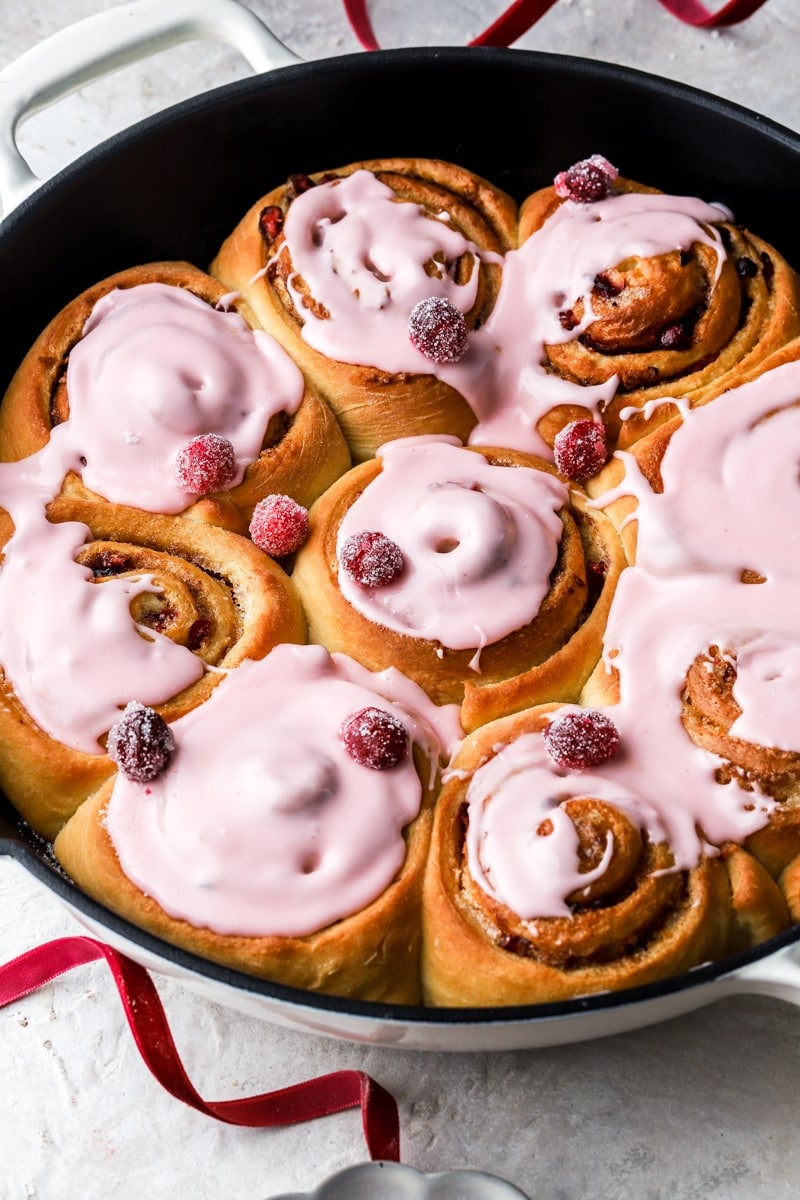
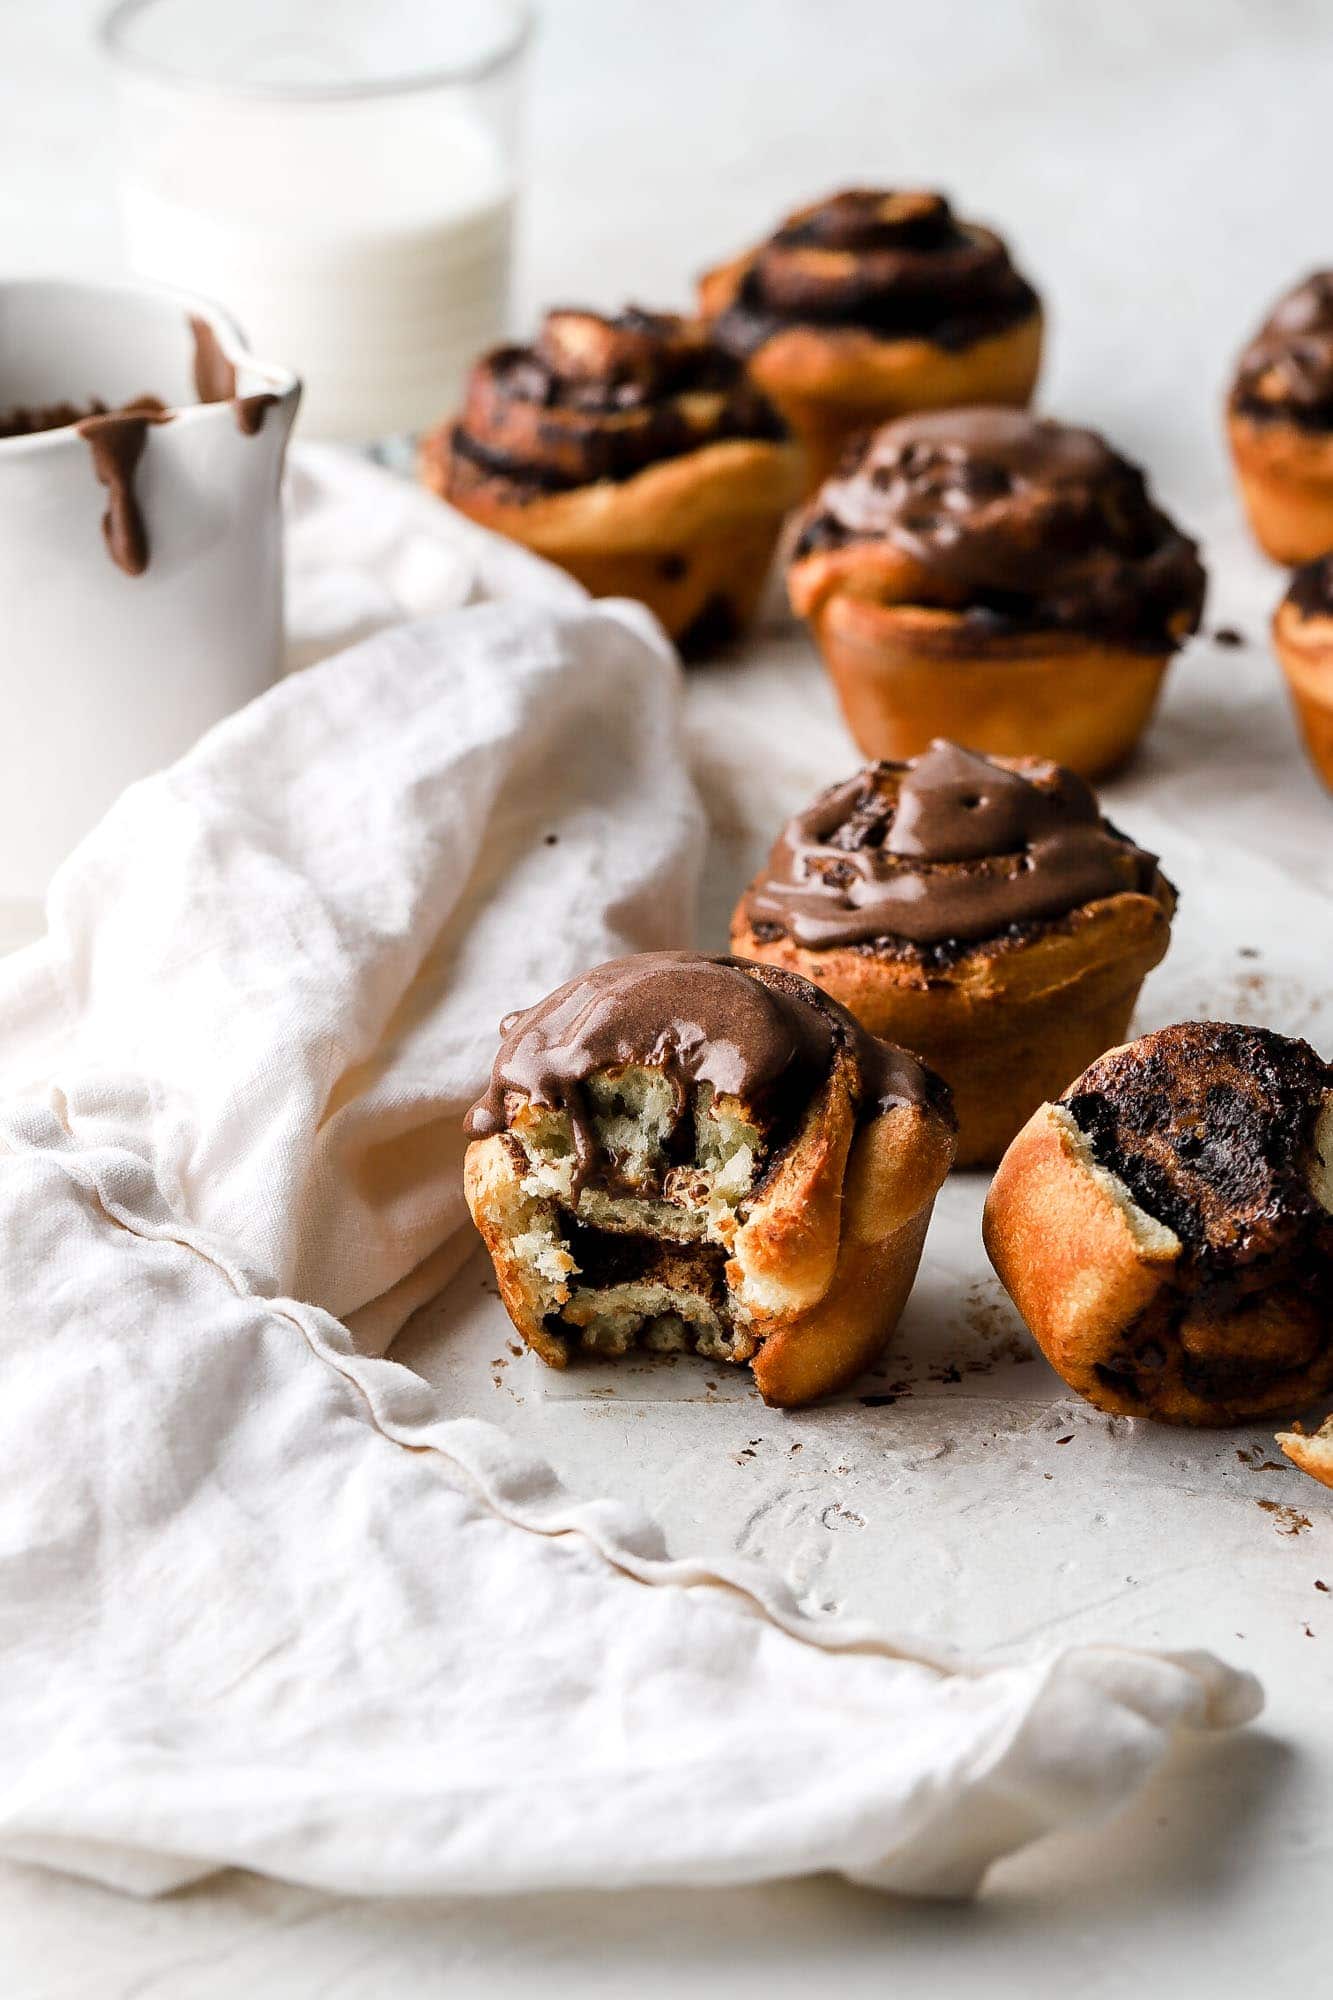
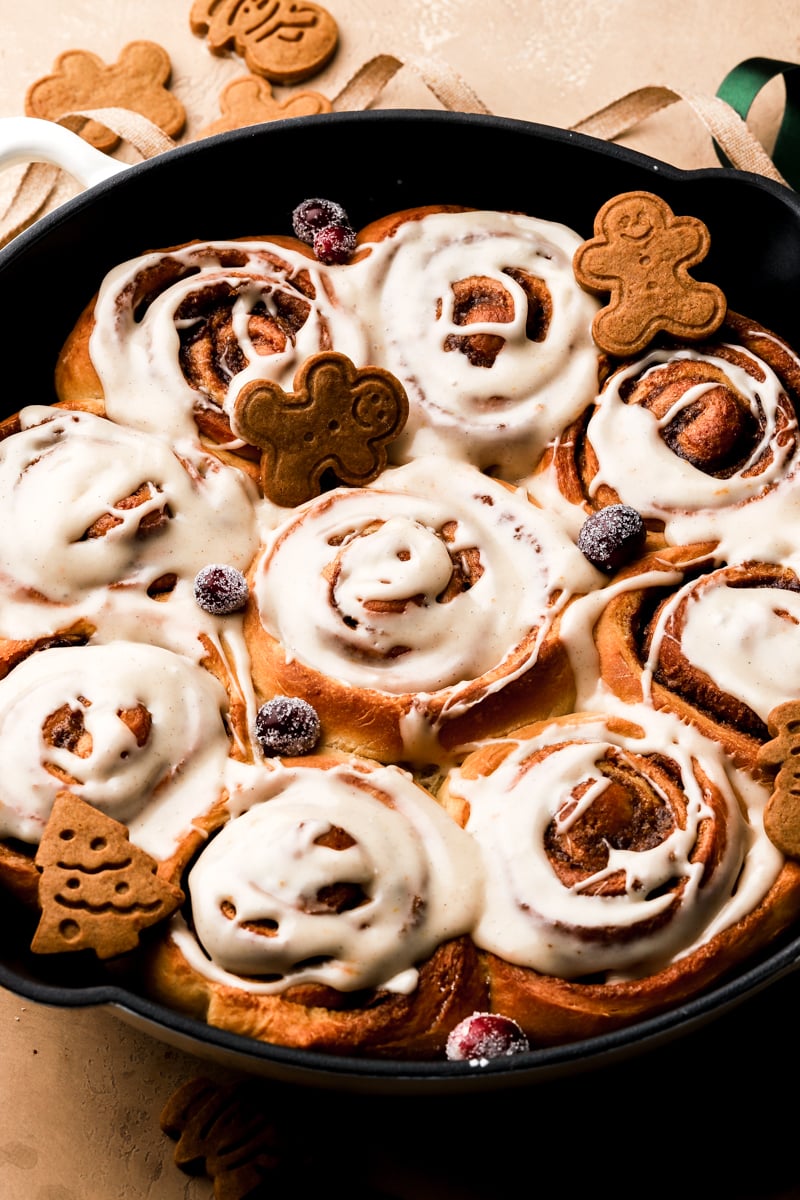
I’ve created a few different types of cinnamon rolls, like caramelized white chocolate, lemon and brown butter, carrot cake, chocolate, apple butter, cranberry orange, gingerbread and even s’mores rolls. However, one must never deny that the original is always best.
[adthrive-in-post-video-player video-id=”qrcw9pbx” upload-date=”2024-02-15T23:37:54.000Z” name=”Cinnamon Rolls.MOV” description=”These homemade cinnamon rolls are super fluffy, made with brioche dough, rolled with butter, brown sugar and cinnamon, baked in cream and frosted with cream cheese frosting; perfect for Christmas morning… or like all the time. ” player-type=”default” override-embed=”default”]

Cinnamon rolls are only the most glorious dessert to ever be created. I actually think it is my favorite dessert to make and eat. However it’s not like pizza where even bad pizza is good because all pizza is good. It’s more like, a great cinnamon roll can change your life and then you’ll never want a different one LOL.
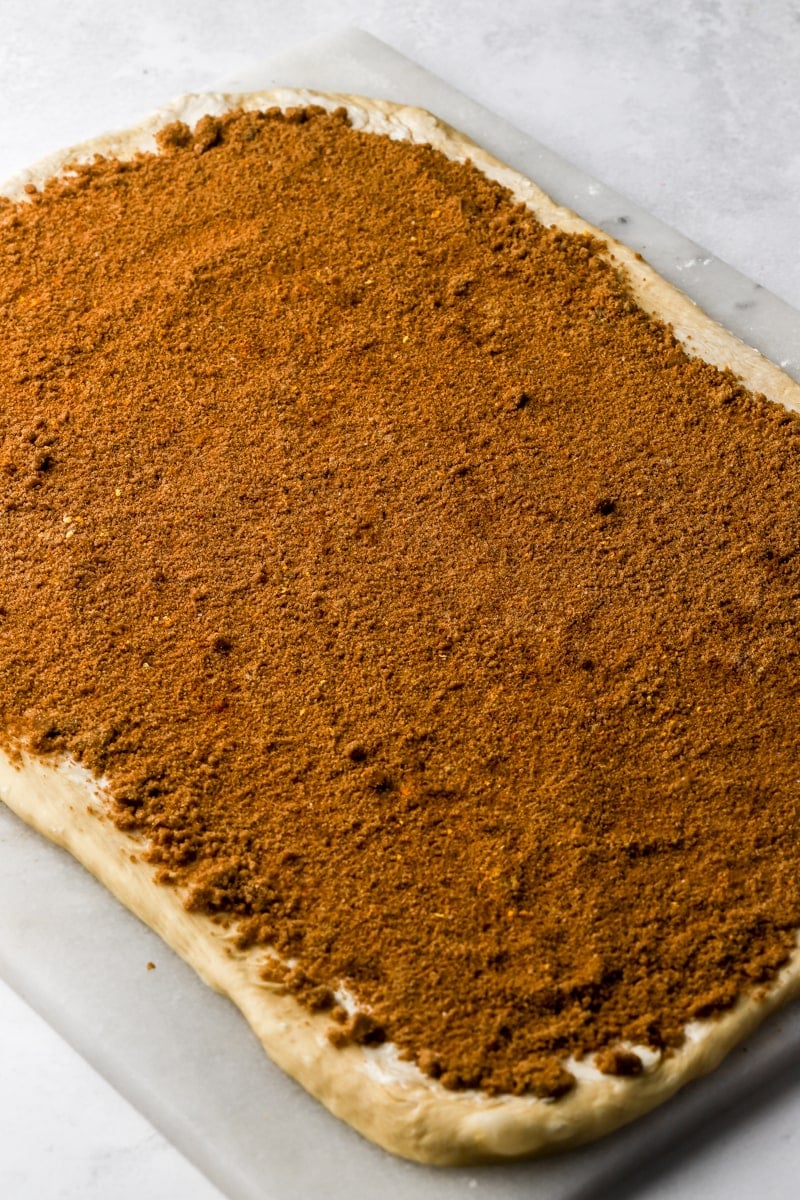
Anyway, it’s basically a brioche dough that gets spread out into a large rectangle. Then it gets smeared with butter, sugar and cinnamon on top. Now roll it up into a log, slice it and drench it with cream cheese frosting after baking.
The result is, as I said, glorious fluffy bread that’s sweet, cozy and creamy.
What is brioche dough?
There is lean dough, like ciabatta, bagels and traditional bread, which is generally made of just flour, water, yeast and salt. These doughs usually don’t contain much fat in them unlike enriched dough.
Enriched dough generally refers to a dough that’s rich in butter, eggs, milk, and/or sugar, etc. which makes the dough higher in fat, slightly sweeter and more tender. The most popular types of enriched dough are brioche and challah.
Brioche dough usually contains some eggs, milk and/or butter. The ratios are usually specific to the recipe but the main difference between brioche and challah is that traditional challah doesn’t contain dairy, it has a lot more egg yolks and uses olive oil.
The added fat and sugar tenderizes the dough, making it super soft and fluffy. Think fluffy french toast or a soft cream stuffed donut.
How to make brioche dough
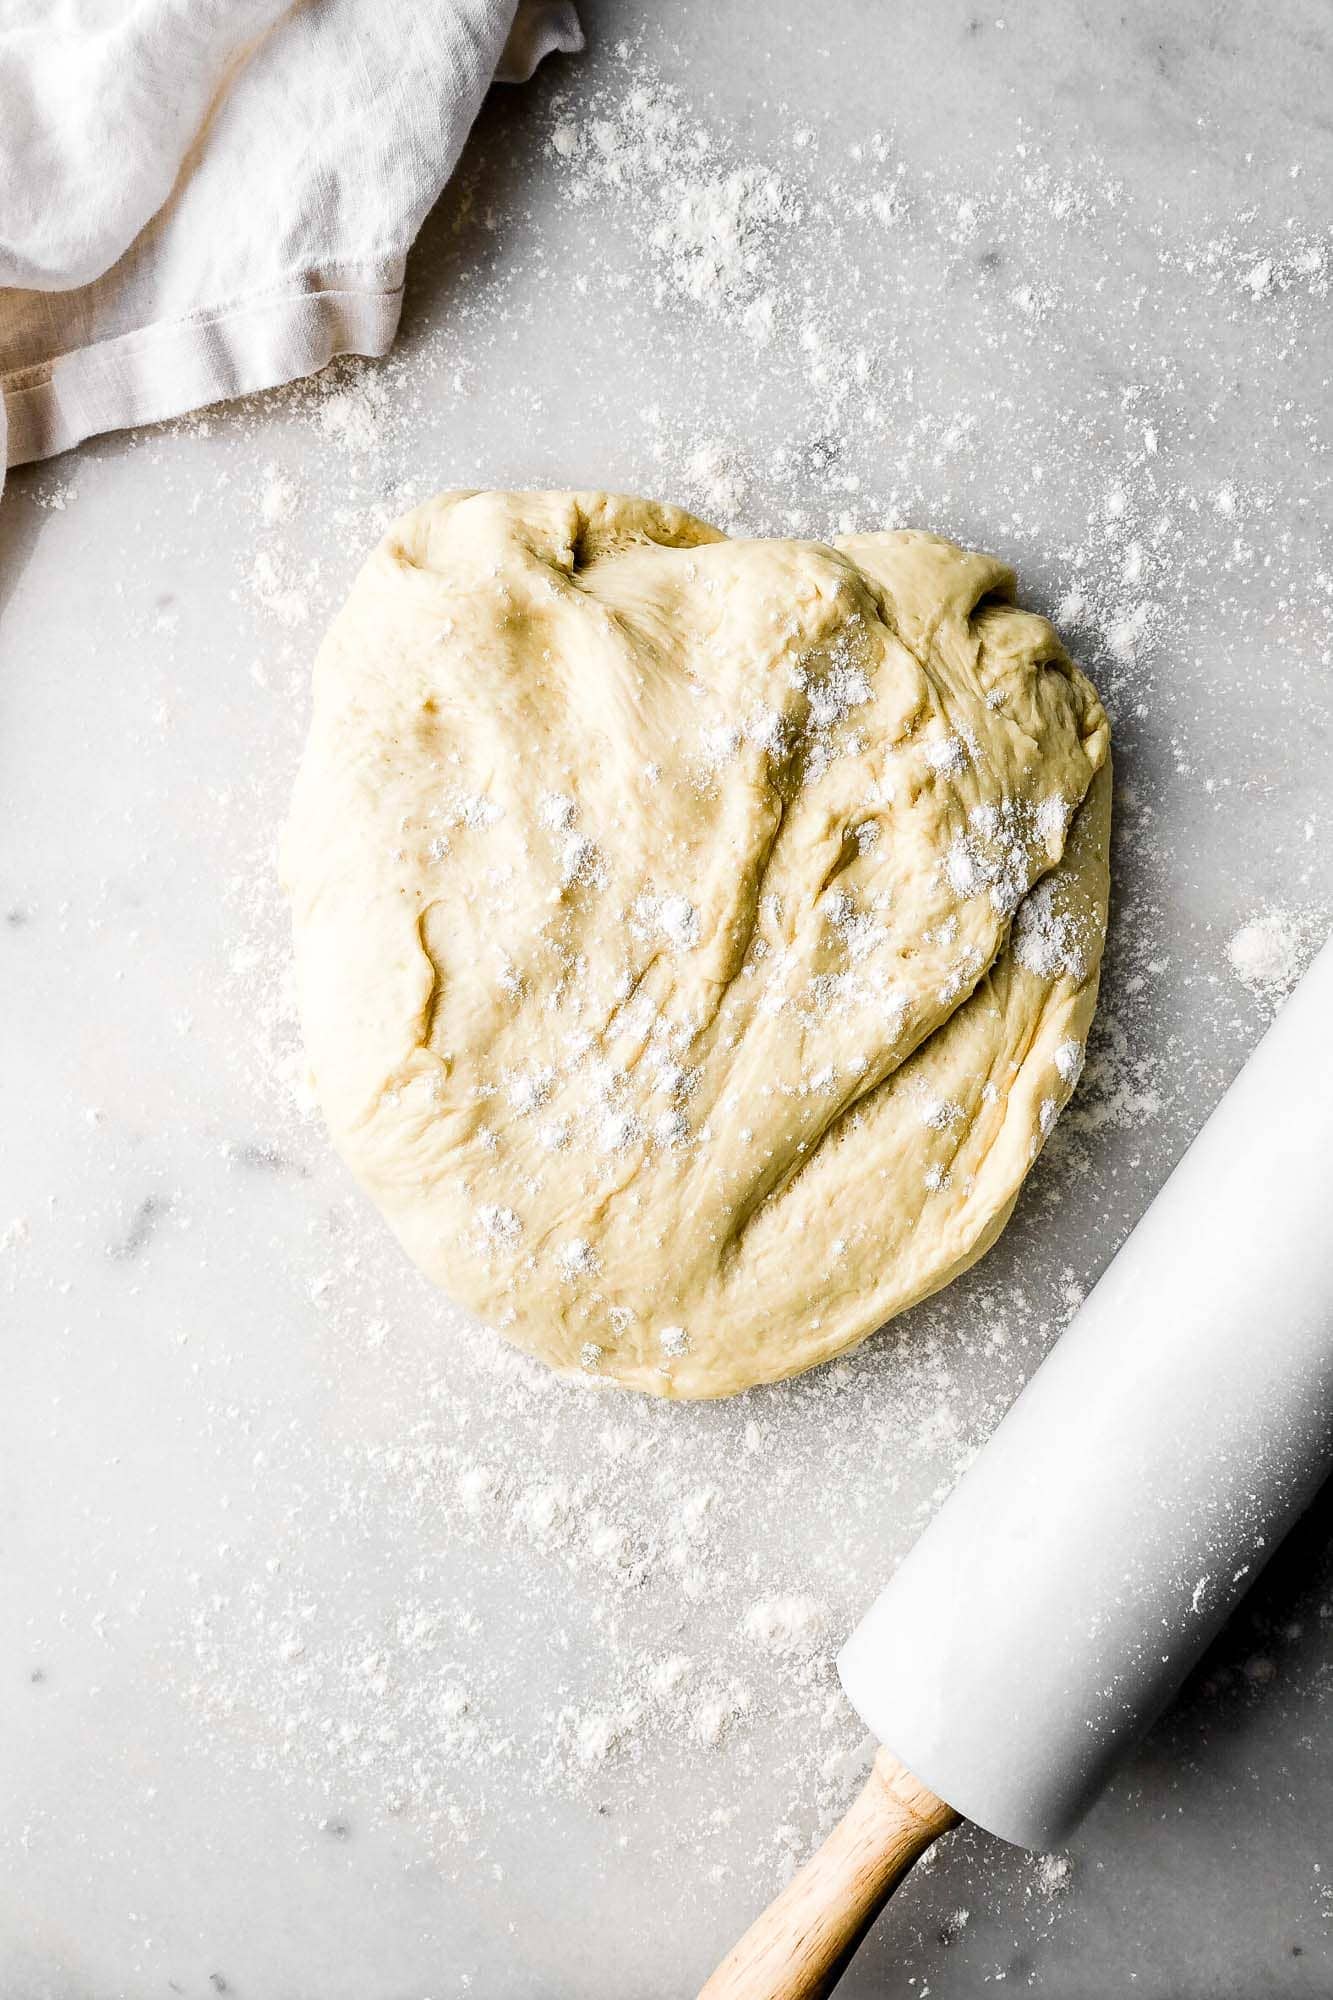
Making dough can be intimidating and it sounds a lot more complicated than it actually is. There is a lot of science behind baking and especially dough with yeast, it’s actually very interesting but I’ll spare you the nerdy stuff. I’ll just give you a few things to keep in mind.
- Flour: the added fats will weigh down the dough, making the gluten weaker. That can be balanced with a flour that has a higher protein content, such as bread flour. This recipe is made specifically using bread flour OR all-purpose flour to make it easier for those who don’t have access to bread flour.
- I highly recommend using a digital scale for weighing your flour.
- With dough, sometimes the amount of flour needed can depend on the environment so you may find you need a couple of tablespoons more or less. Since I add the heavy cream in the pan before baking and the dough stays fluffy and moist from that, I lean towards a little more flour so that the dough is easier to work with.
- Milk: There is an enzyme in milk that weakens the gluten in flour so to counteract that, it’s recommended to heat up the milk. Just before a boil, when the milk is scalding, around 181 °F (83 °C), the enzyme gets denatured. Make sure to then let the milk cool back down to less than 120F (50C) so we don’t kill the yeast.
- To be totally honest, I don’t always heat up my milk that hot and I still get a good rise in my dough.
- UPDATE: I recently switched over to using warm water for my brioche dough and find that it makes a fluffier and more tender dough for cinnamon rolls and donuts (the added eggs, sugar and butter/oil still consider it an enriched dough).
- Yeast: this recipe works with both active dry yeast and instant yeast. I follow the same process for most of the dough except for active dry yeast, you’ll want to activate the yeast (see below) and for instant yeast, you can just add it in with the flour.
- Mixing: Depending on the type of yeast, the beginning additions can vary a little but the mixing process is simple.
- UPDATE: I’ve also recently updated the mixing process to be more simple. Just combine all the wet ingredients (after activating yeast if using active dry yeast) and then add the flour. Knead for about 10 minutes.
- Proofing: Dough proofs best at room temperature or slightly warmer. The colder the room, the slower the rise will be. I like to keep it somewhere between about 75-100°F (24-38°C).
What kind of yeast to use for brioche dough
I wanted to do a whole separate section on this to explain how to use both active dry yeast and instant yeast in this recipe. I’ve made this recipe many many times with both types and both of them turn out amazing.
The recipe is written using active dry yeast because that’s what most people use. But if you want to substitute it for instant/rapid rise yeast, just skip the activation.
Active Dry Yeast
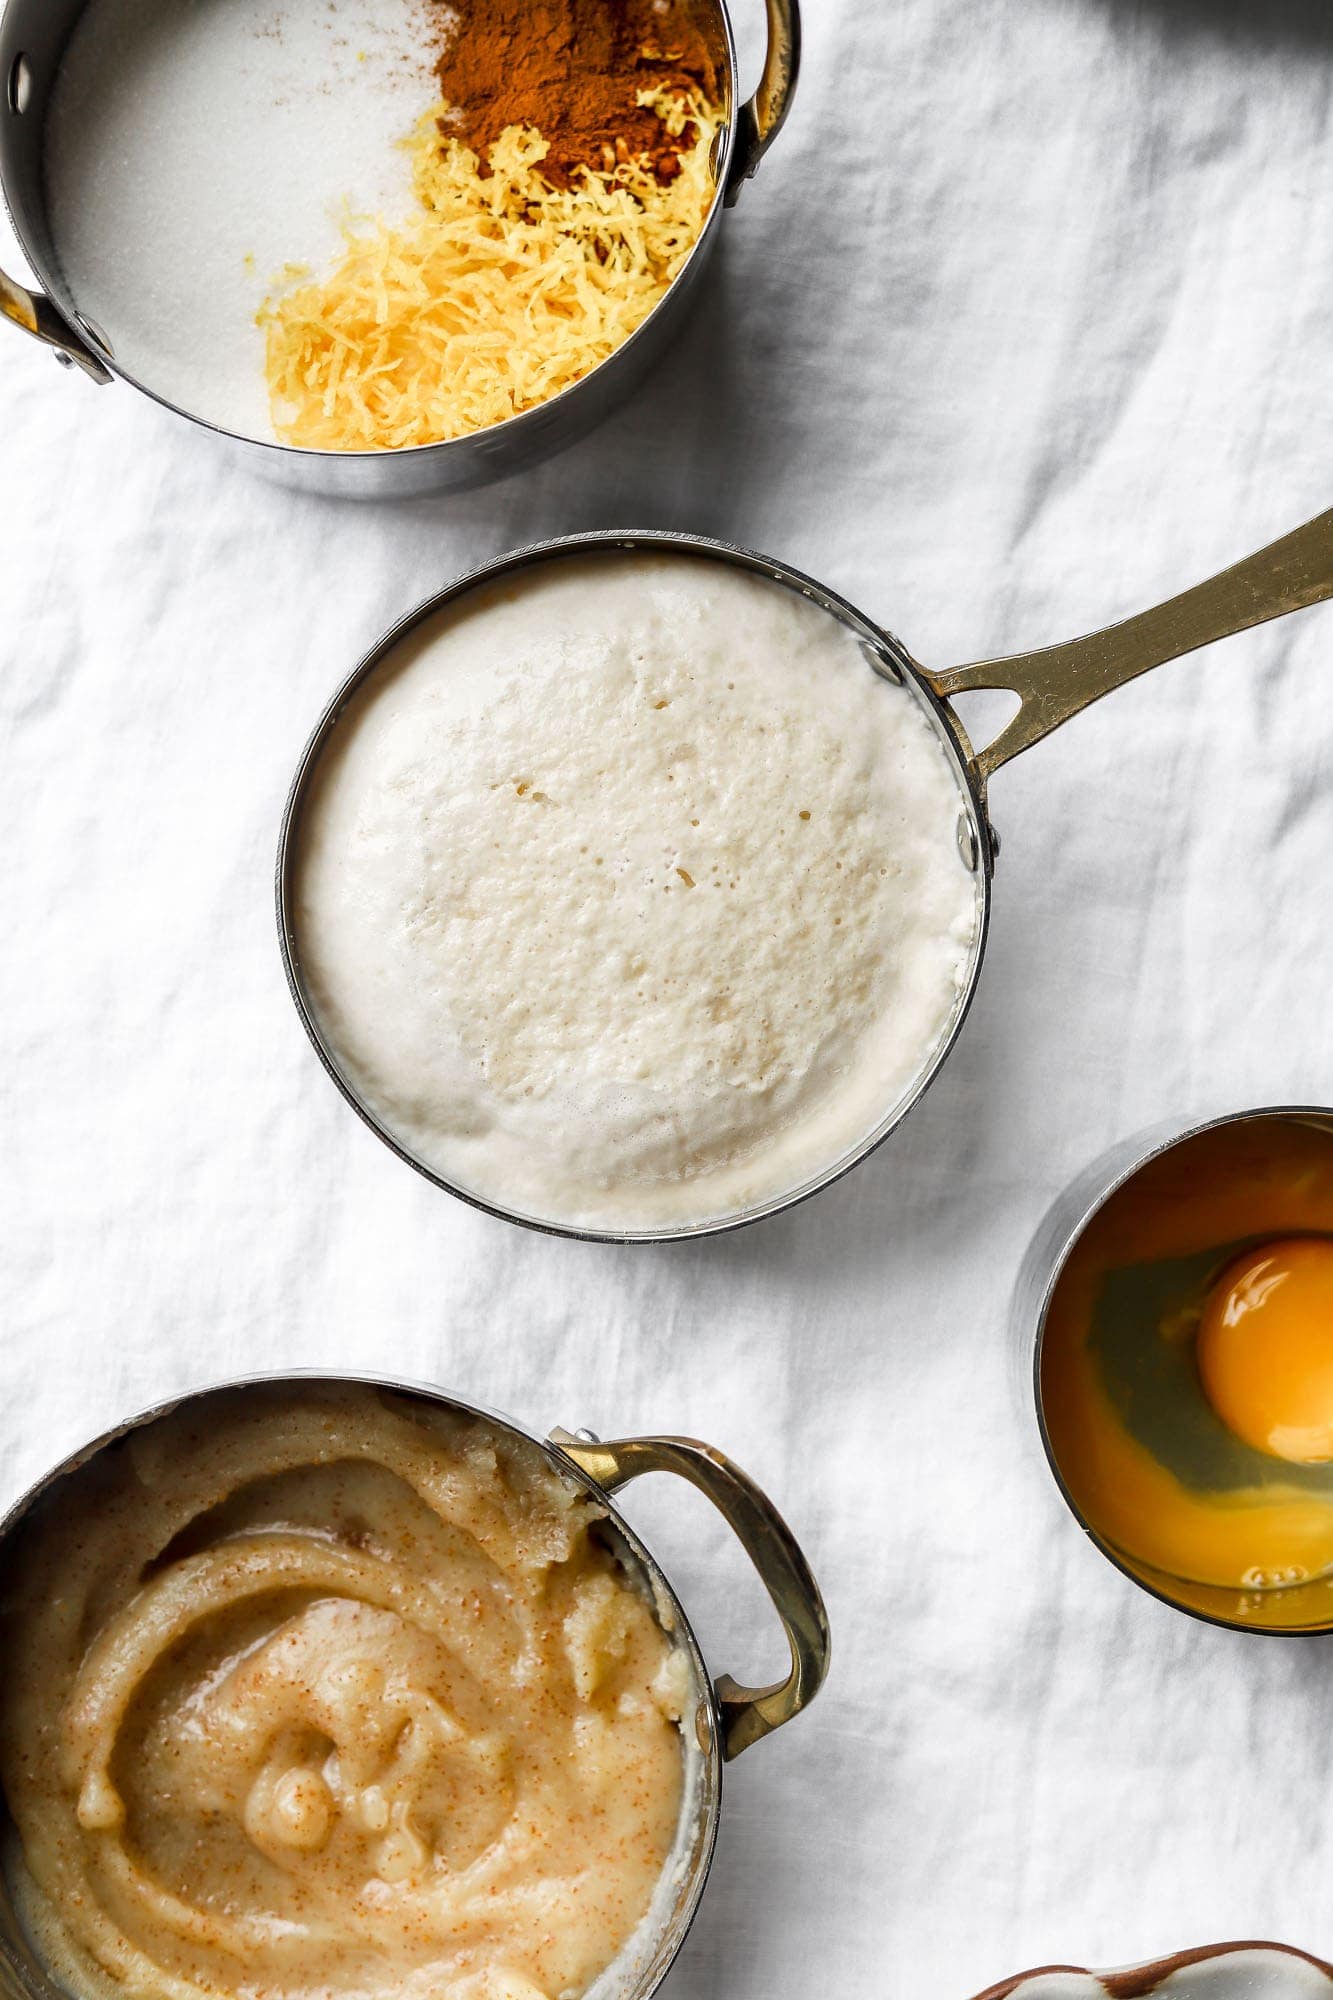
Active dry yeast needs to be activated. To do this, combine the warm water with the yeast and HALF of the sugar in a large cup. Mix it and let it rest for 10 minutes. The water should develop a thick layer of foam on top (see photo above).
If the yeast mixture doesn’t foam after at least 10-15 minutes, then the water was either too hot and killed the yeast or the yeast has expired. To be safe, make sure the water is lower than 120 °F (50 °C).
After the mixture has foamed, combine it with the rest of the ingredients and proceed to kneading.
Instant Yeast
If using instant yeast, skip activation.
Combine all the wet ingredients with the sugar in the bowl of the stand mixer, then add the flour, yeast and salt on top and mix until it comes together. Proceed the same way with the kneading.
How Long To Knead Brioche Dough
Kneading brioche can take anywhere from 5-15 minutes with a stand mixer or double/triple that by hand.
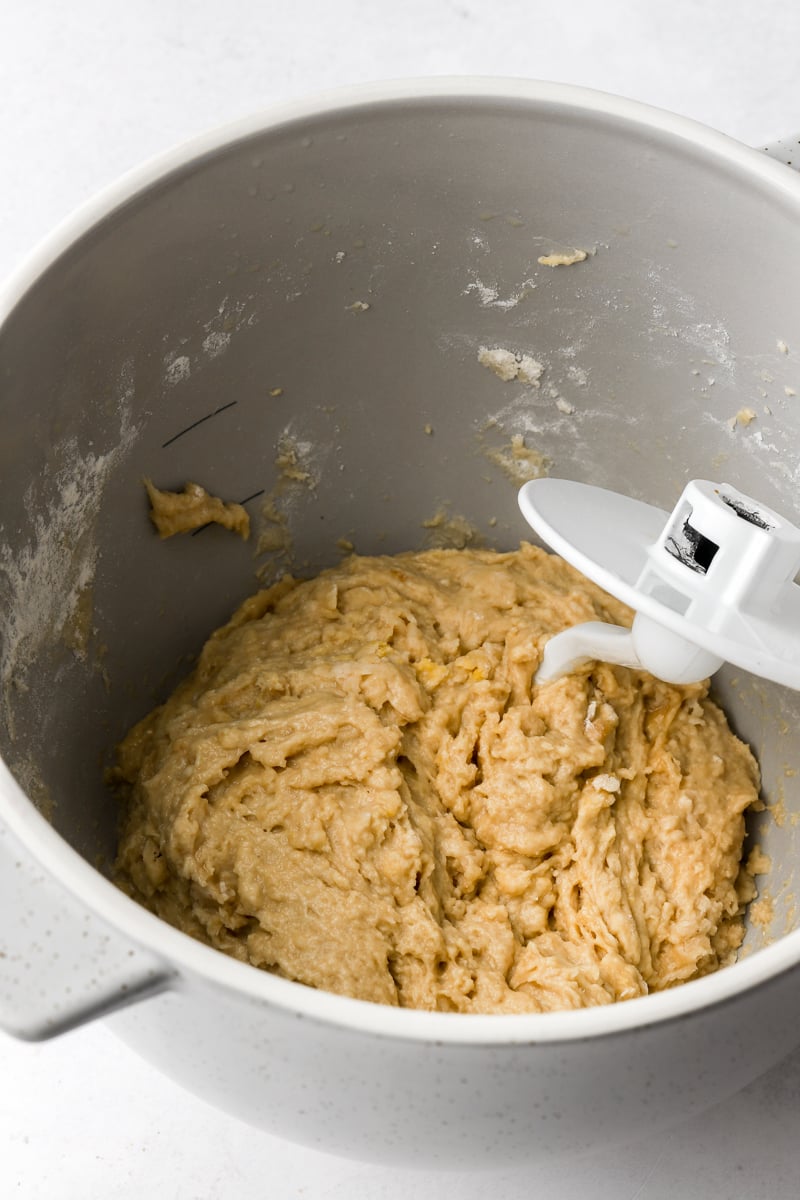
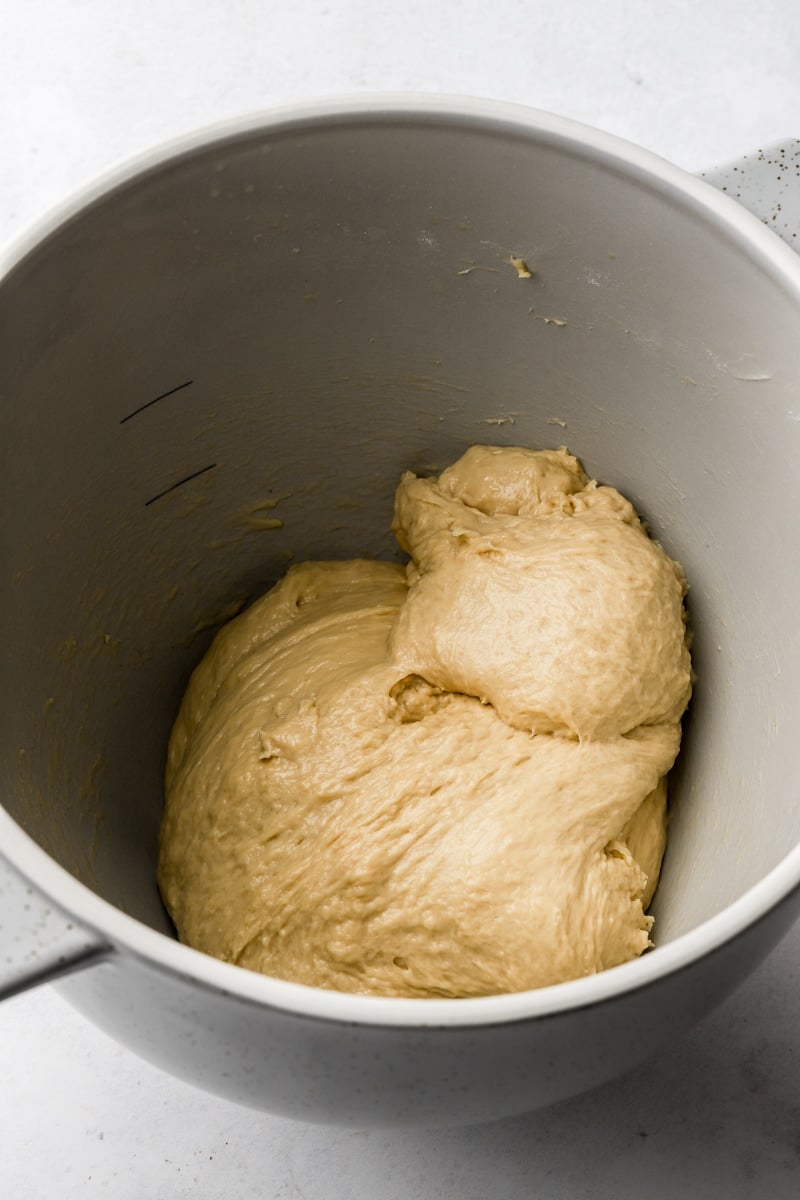
I like to use my Kitchen aid 5qt stand mixer with a hook attachment on speed 2. You can see in the images below how the dough looks when it first comes together vs. when I’m done kneading. It generally takes me about 10-12 minutes.
There’s a few markers I use to know when the dough is done kneading.
- The dough should form a ball around the hook attachment on the stand mixer and not stick to the sides of the bowl anymore. It may still stick to the bottom of the bowl a little but not all over the sides.
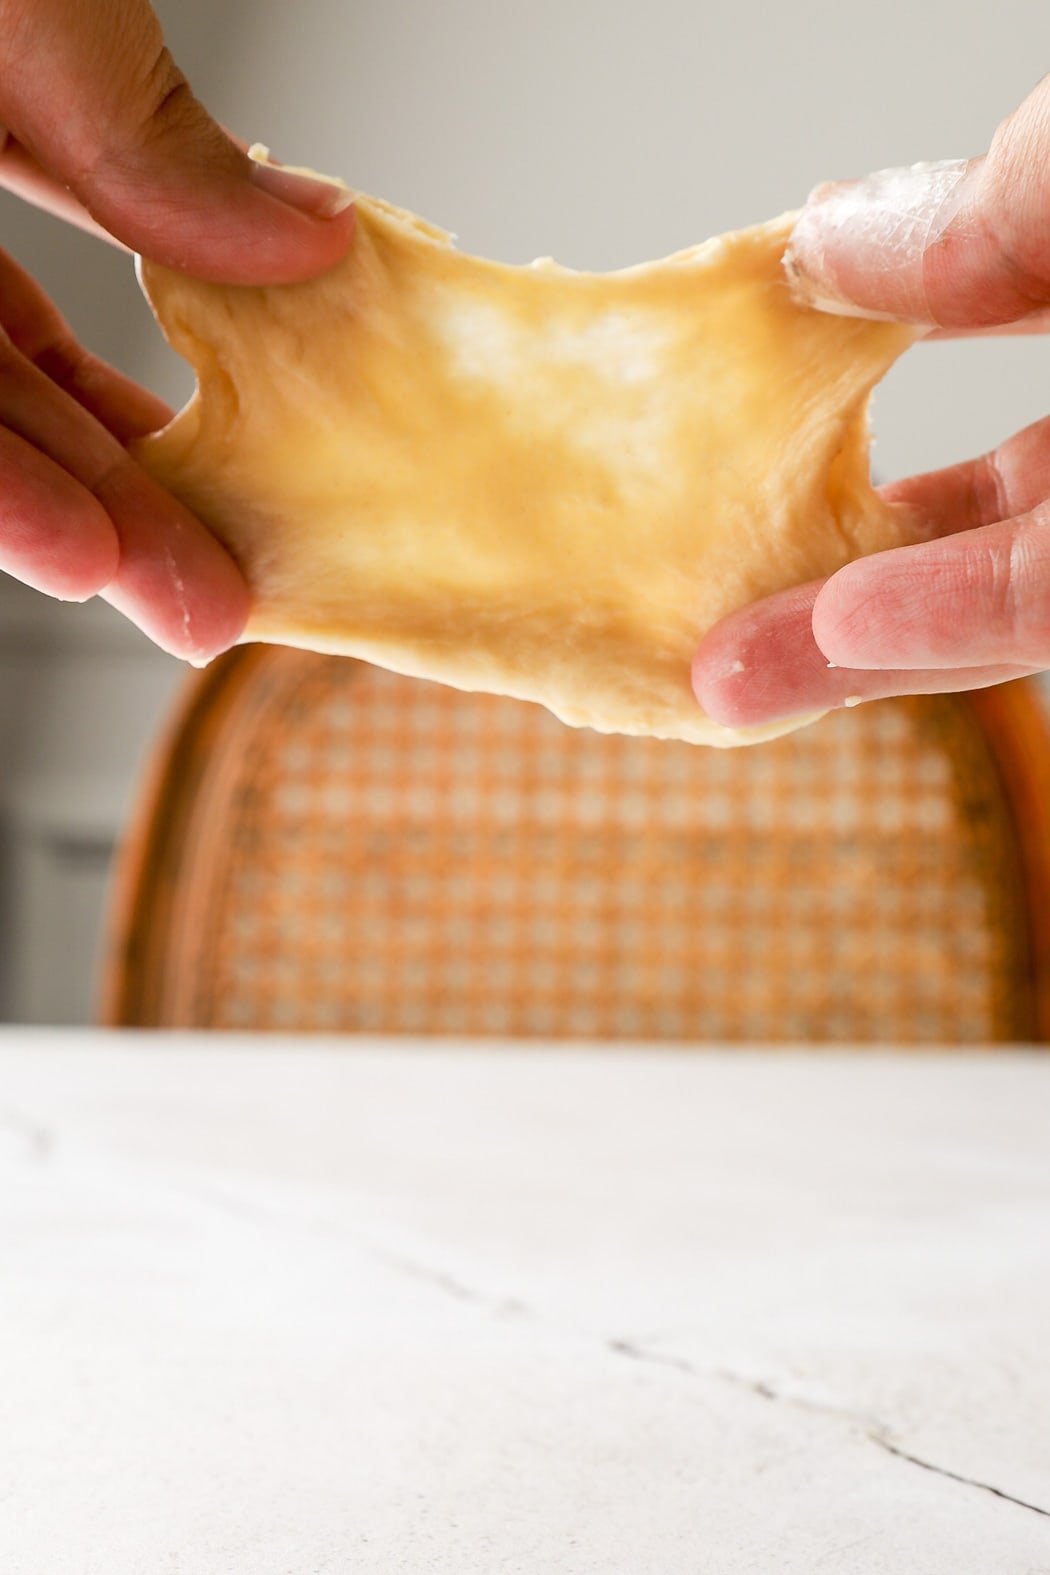
- The dough should also pass the windowpane test. The windowpane test is when you stretch a piece of the dough between your fingers until it’s thin enough to see light through before the dough tears.
If your dough is not passing any of these but is fairly close, that’s ok, just move on after kneading for 10-15 minutes.
If your dough is still really sticky and you can’t even touch it without it sticking to everything, add 2 more tablespoons of flour at a time, until your dough is able to be handled without sticking to your hand.
What temperature to proof dough at?
You want to make sure your dough is proofing at a comfortable temperature. Generally, room temperature is fine but if it’s slightly warmer, you’ll get a much quicker rise.
Yeast dies at around 120F (50C) so make sure the temperature is lower than that. I recommend anywhere between 75F (24C) to 100F (38C).
The dough can also be proofed in the refrigerator. This is called a retarding proof because it really slows down the process. The Benefit of this is that you can just pop the dough in the fridge overnight and the dough will develop a stronger flavor if it proofs for longer.
You can refrigerate the dough overnight for the first proof or the second proof, just bring it back to room temperature before proceeding with the recipe.


How to know when dough is done rising/proofing
Rising and proofing are typically used interchangeably but the initial ‘resting time’ is actually the rising and the second ‘resting time’ is the proofing. The time needed for rising/proofing is dependent on the recipe and the environment.
A general guideline is that the dough should double in size each time. It will look and feel very fluffy but shouldn’t sink in the center or be too loose.
It should also slowly spring back when you press on it, but also leave a small indent. If the dough springs back quickly, then it needs more time to rise. If it doesn’t spring back at all, it may be over proofed and result in less fluffy rolls.
Typically with instant yeast, you’re “allowed” to skip the first rise and just let the dough relax for just 10 minutes instead before shaping the dough. I prefer to still let it rise. It works both ways but I get a fluffier dough from letting it proof twice, regardless of the yeast.
How to assemble the rolls (different sizes)
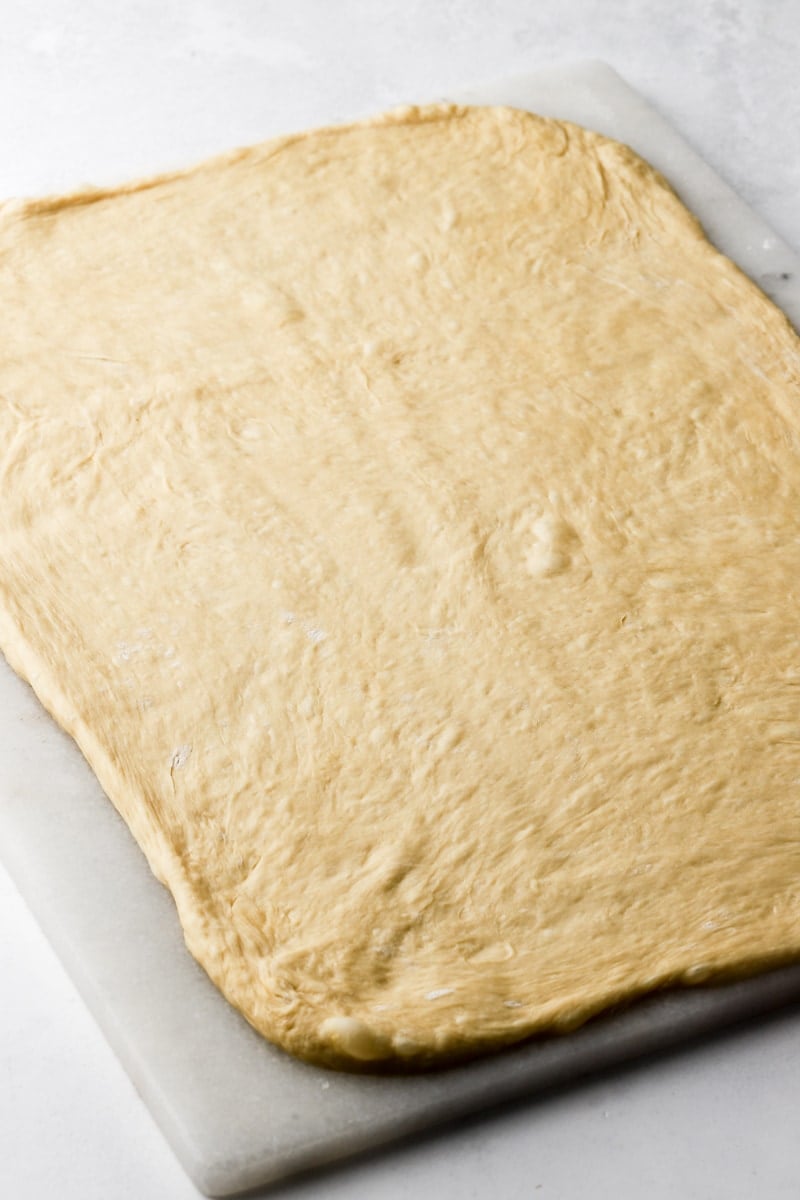
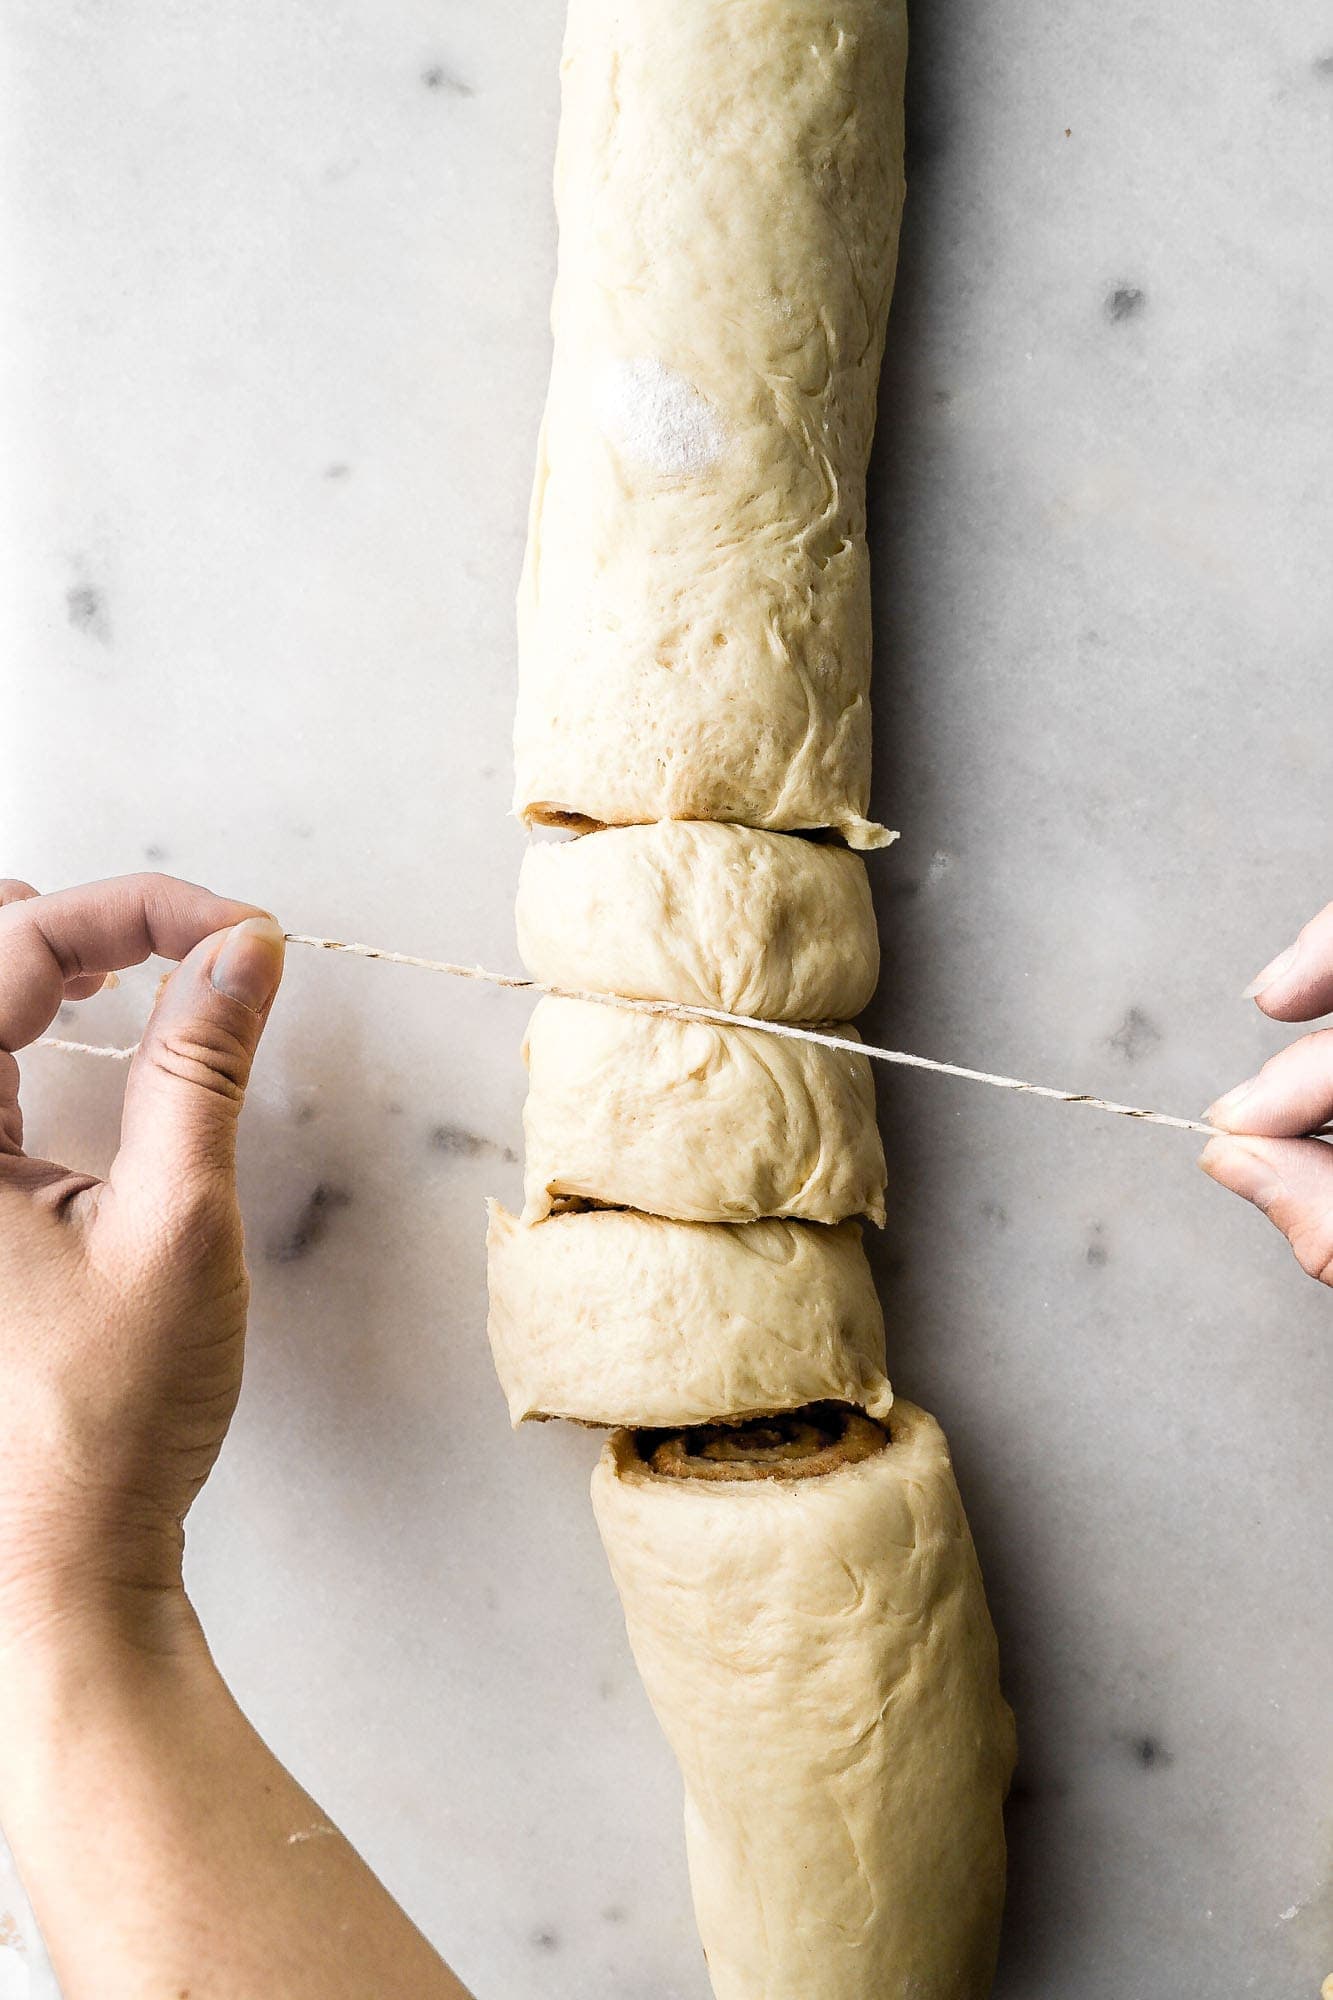
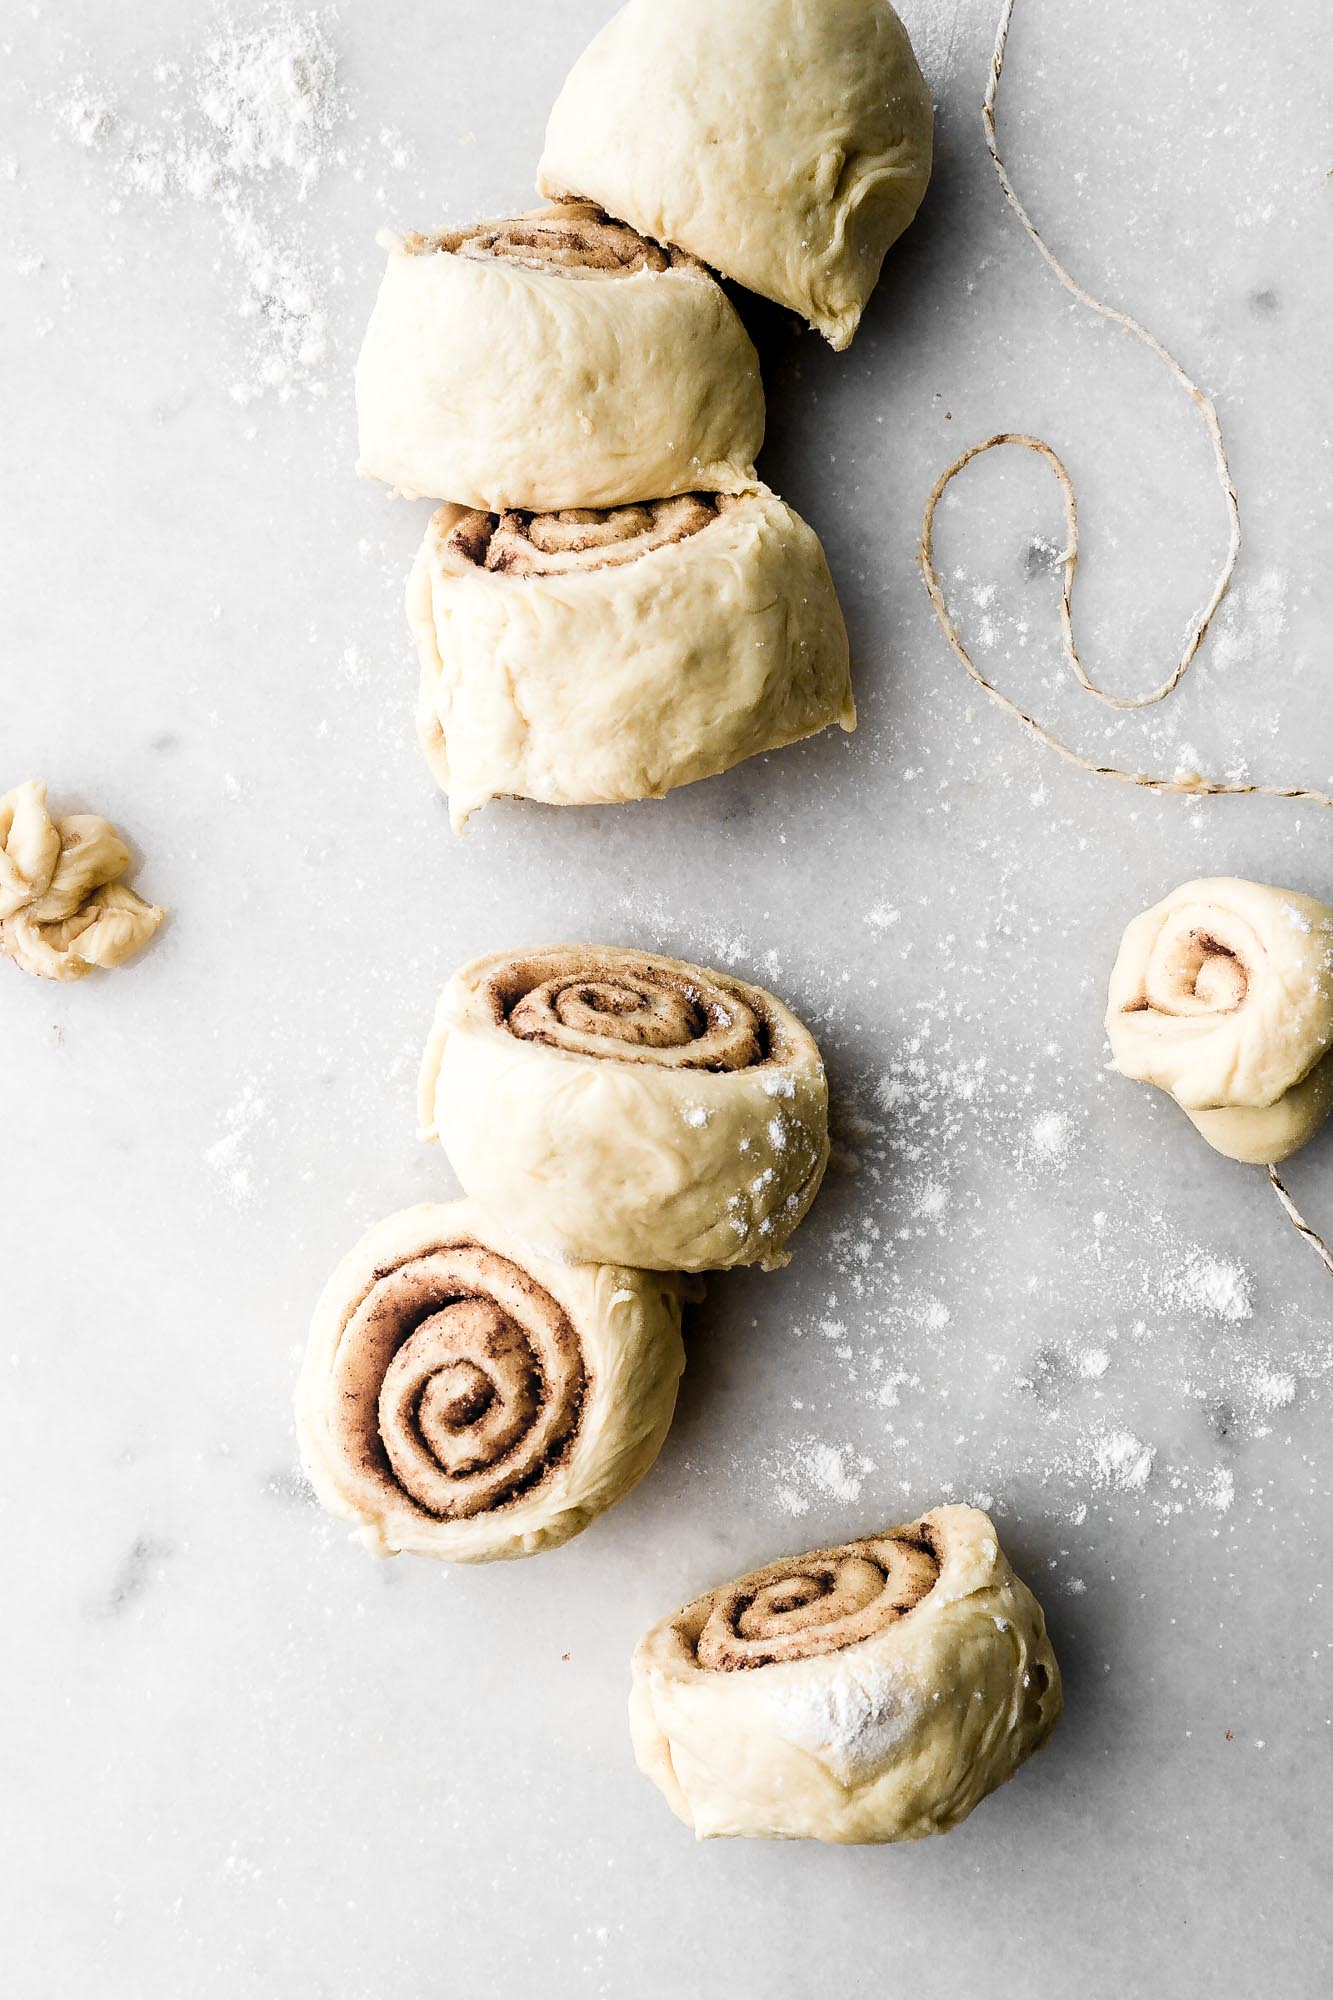
Typically the dough gets stretched out to about 12-16 inch rectangle. Spread the filling on top and then it gets rolled from short end to short end and you’re left with a shorter, thick log.
- You can get 12 good size cinnamon rolls from rolling it this way. Bake them for about 26-28 minutes.
- You can slice the log into 9 slightly larger cinnamon rolls instead. Bake these for about 30-32 minutes.
- If you want to make smaller rolls, roll the dough from long end to long end and you’ll end up with a longer, thinner log. Slice into about 18 rolls and bake for 18-22 minutes, depending on the size.
To get clean slices, you can use unflavored floss, thin twine or a large greased serrated knife.
*You can either spread the butter onto the dough and then top with a cinnamon sugar mixture OR you can mix together the softened butter with the cinnamon sugar mixture and then spread that all on top. Either way works fine!
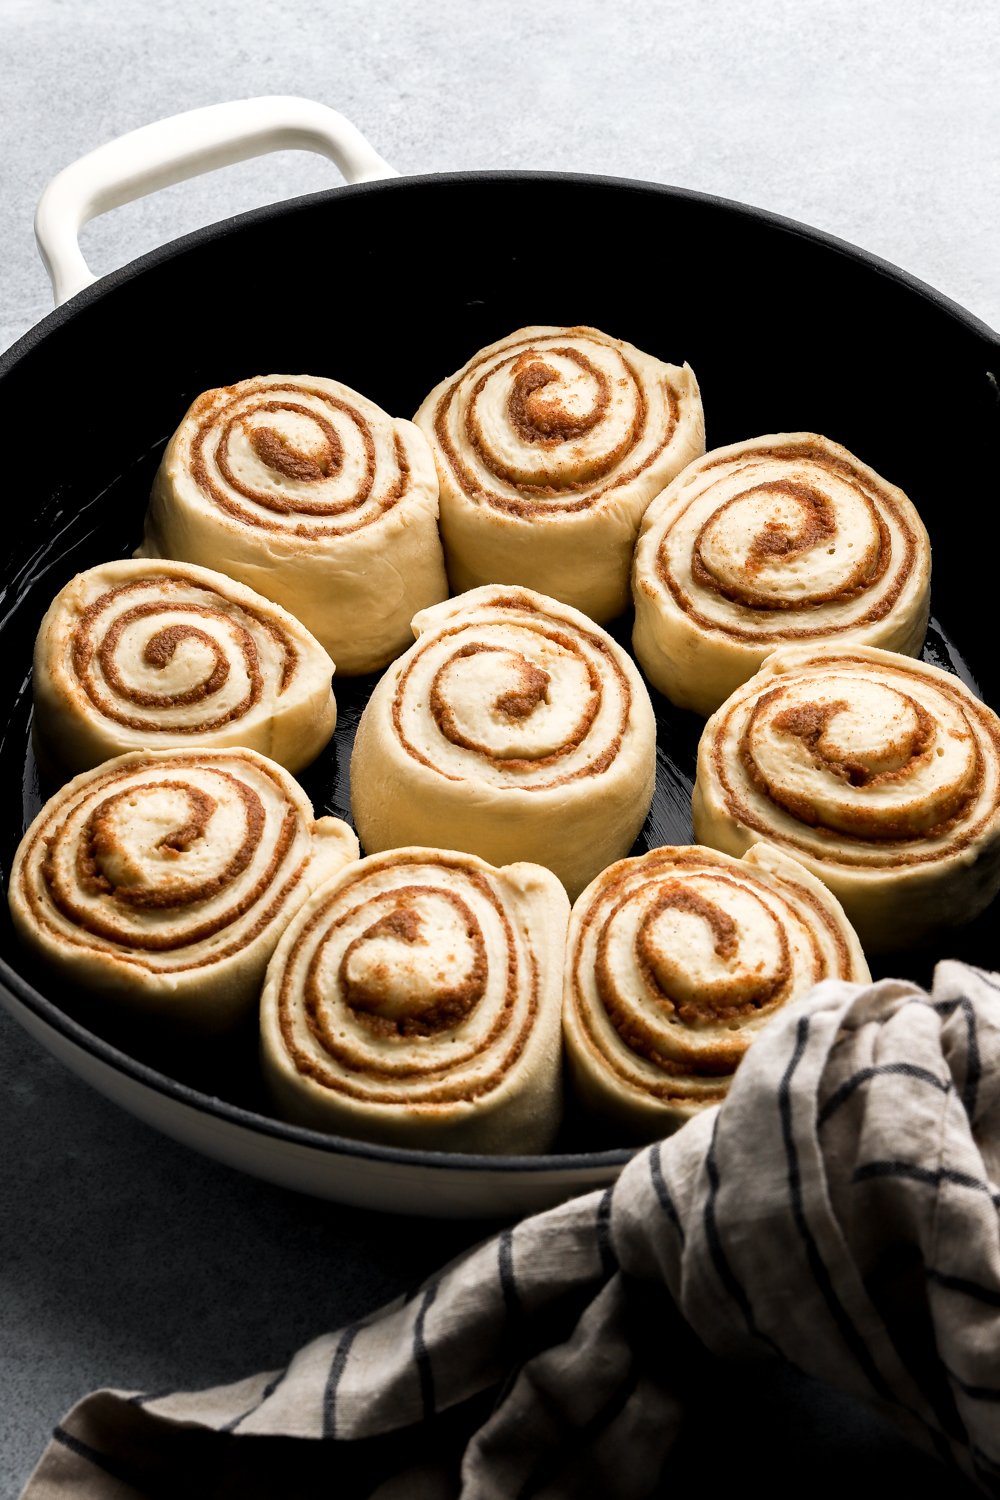
What pan to bake the cinnamon rolls in
I prefer a cast iron pan or a metal pan. Ceramic and glass pans are ok too but they usually heat more unevenly and brown less.
- For 12 rolls I use my metal, 13″ round cast iron pan (3 rolls in the center, 9 around the edges), a 9x13x2 inch pan or one that is just slightly larger that that.
- You can also do 6 rolls in two smaller pans like I did below.
- For 9 larger cinnamon rolls, I like a 13 inch round cast iron pan but a regular pan also works and a 12 inch square pan will work fine too.
- For smaller rolls (18 or so) you can use any of the pans mentioned, just space them out to allow them to double in size, like I did in the pictures below.
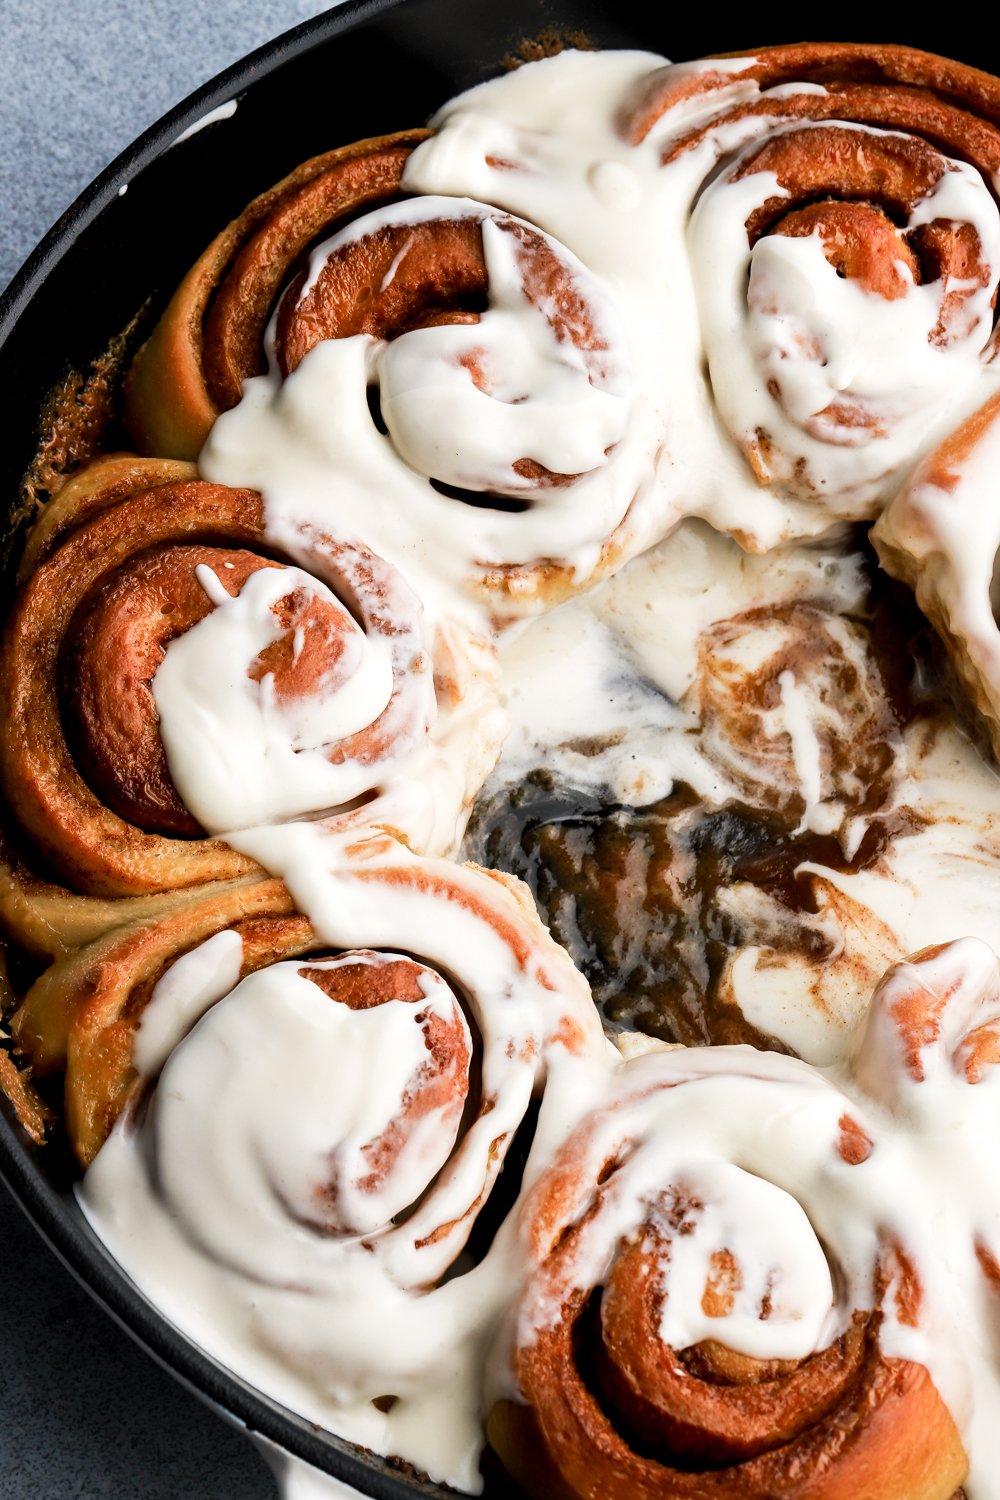
Baking cinnamon rolls with heavy cream
Ok, if you’re on tiktok this won’t surprise you but to the rest of the world I think it’s quite weird lol. There was this pillsbury cinnamon roll hack where people added heavy cream to the pan of cinnamon roll dough before baking and they baked into giant clouds of cinnamon roll goodness.
So I tried it with my recipe and LET ME TELL YOU, I am never going back. I will forever bake my cinnamon rolls in a heavy cream bath lol. It’s quite simple, you just pour a little heavy cream, about half a cup, in the gaps between the proofed cinnamon rolls and bake for a few extra minutes.
What it does is basically make the whole cinnamon roll feel like that gorgeous center nugget we all can’t wait to get to. All I can say is thank you to the genius who came up with this and you’re welcome for sharing it with all the lovely people who read my little blog lol.
How to make cinnamon rolls overnight
Brioche cinnamon rolls can easily be prepped the night before and baked in the morning. After the dough is rolled and sliced and placed in the prepared pan, cover it tightly with plastic wrap and place them in the fridge or freezer. Refrigerate overnight or freeze for a couple of weeks and then bring to room temperature before baking.
From the fridge, it may take 1-2 hours to bring to room temperature (again, don’t want to overproof so don’t leave it out too long).
From the freezer it may take several hours, feel free to thaw it in the fridge overnight so it’s quicker.
Proceed with normal baking instructions (heavy cream goes in right before baking).

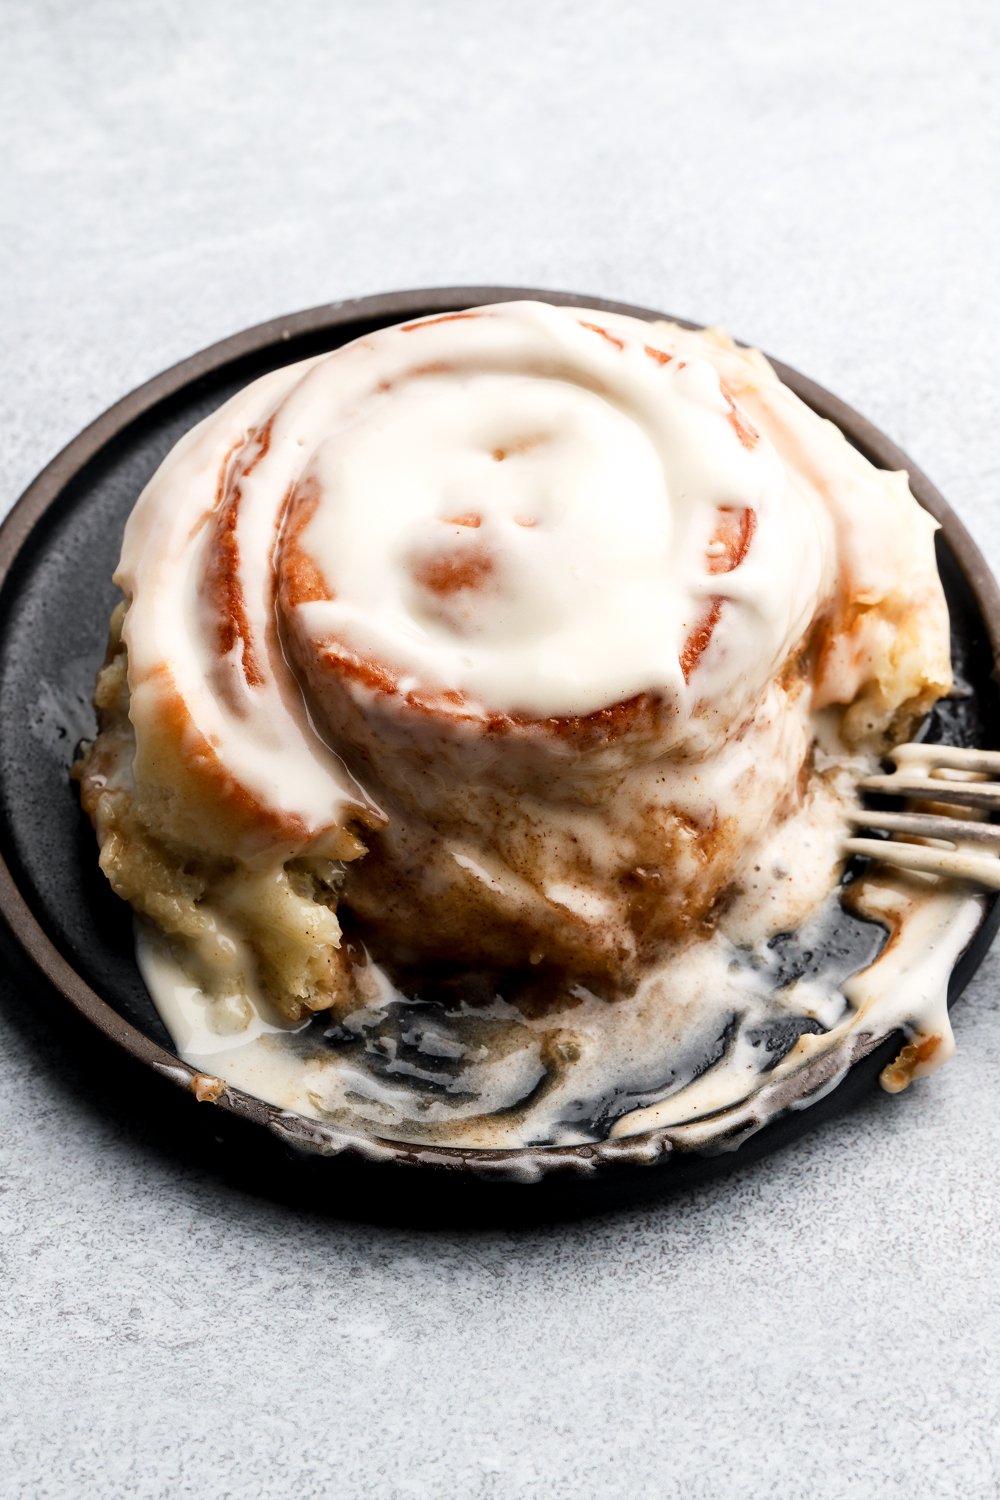
The best cinnamon roll frosting
There are so many different ways to make frosting for cinnamon rolls. You’ll notice in my different flavors I have different types of frosting – some are thin and more like a glaze and then some are a thicker consistency more like traditional frosting.
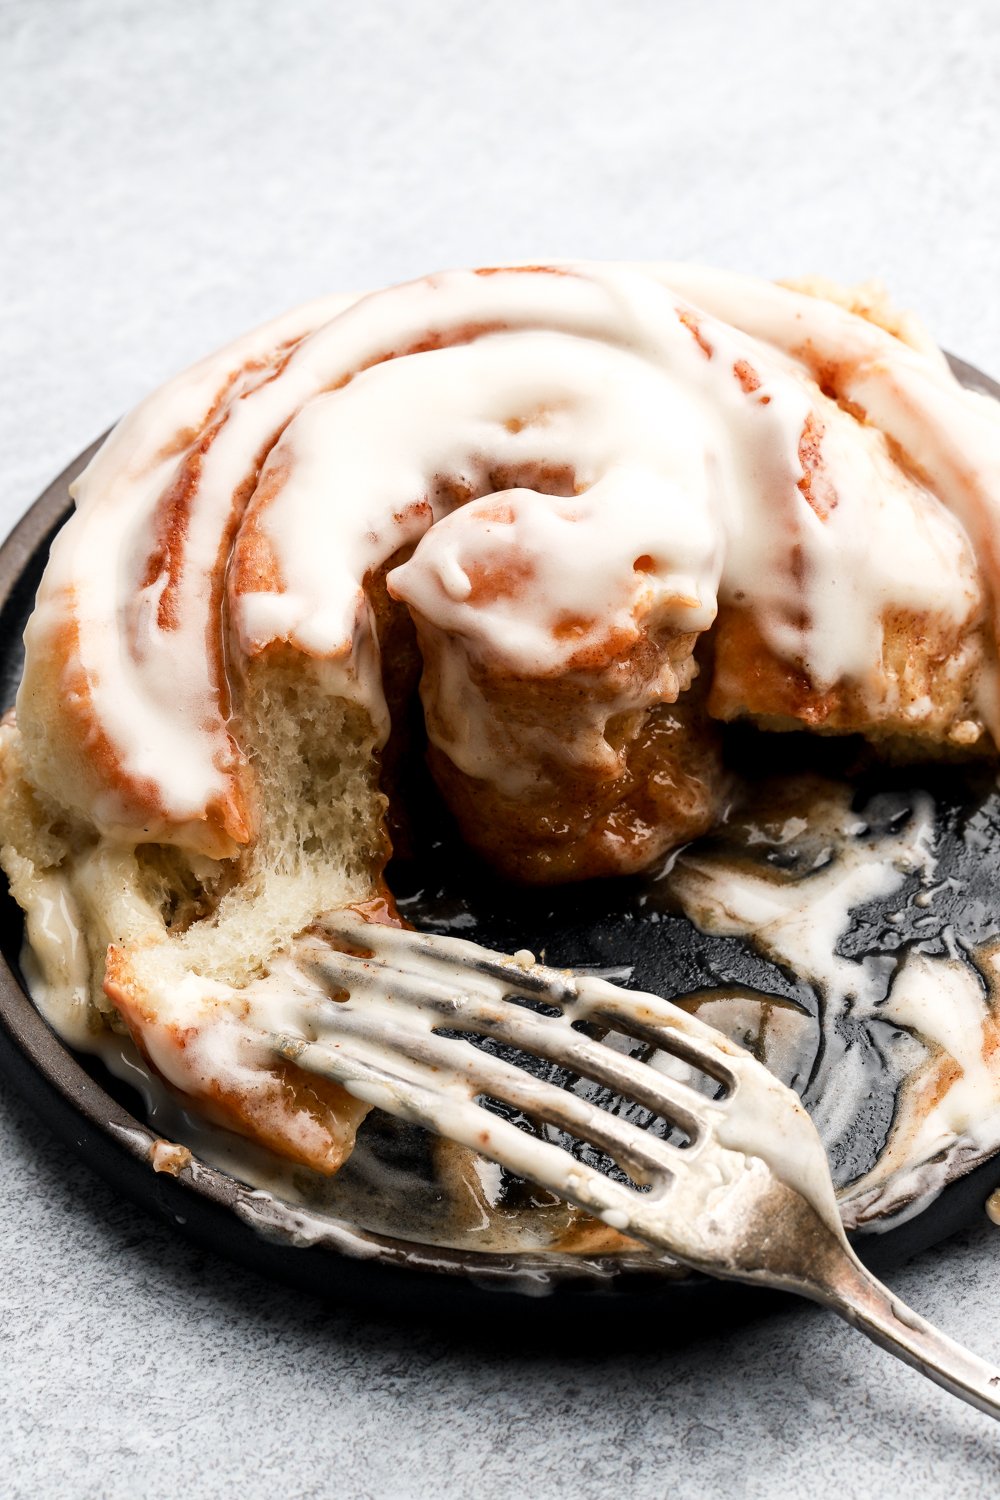
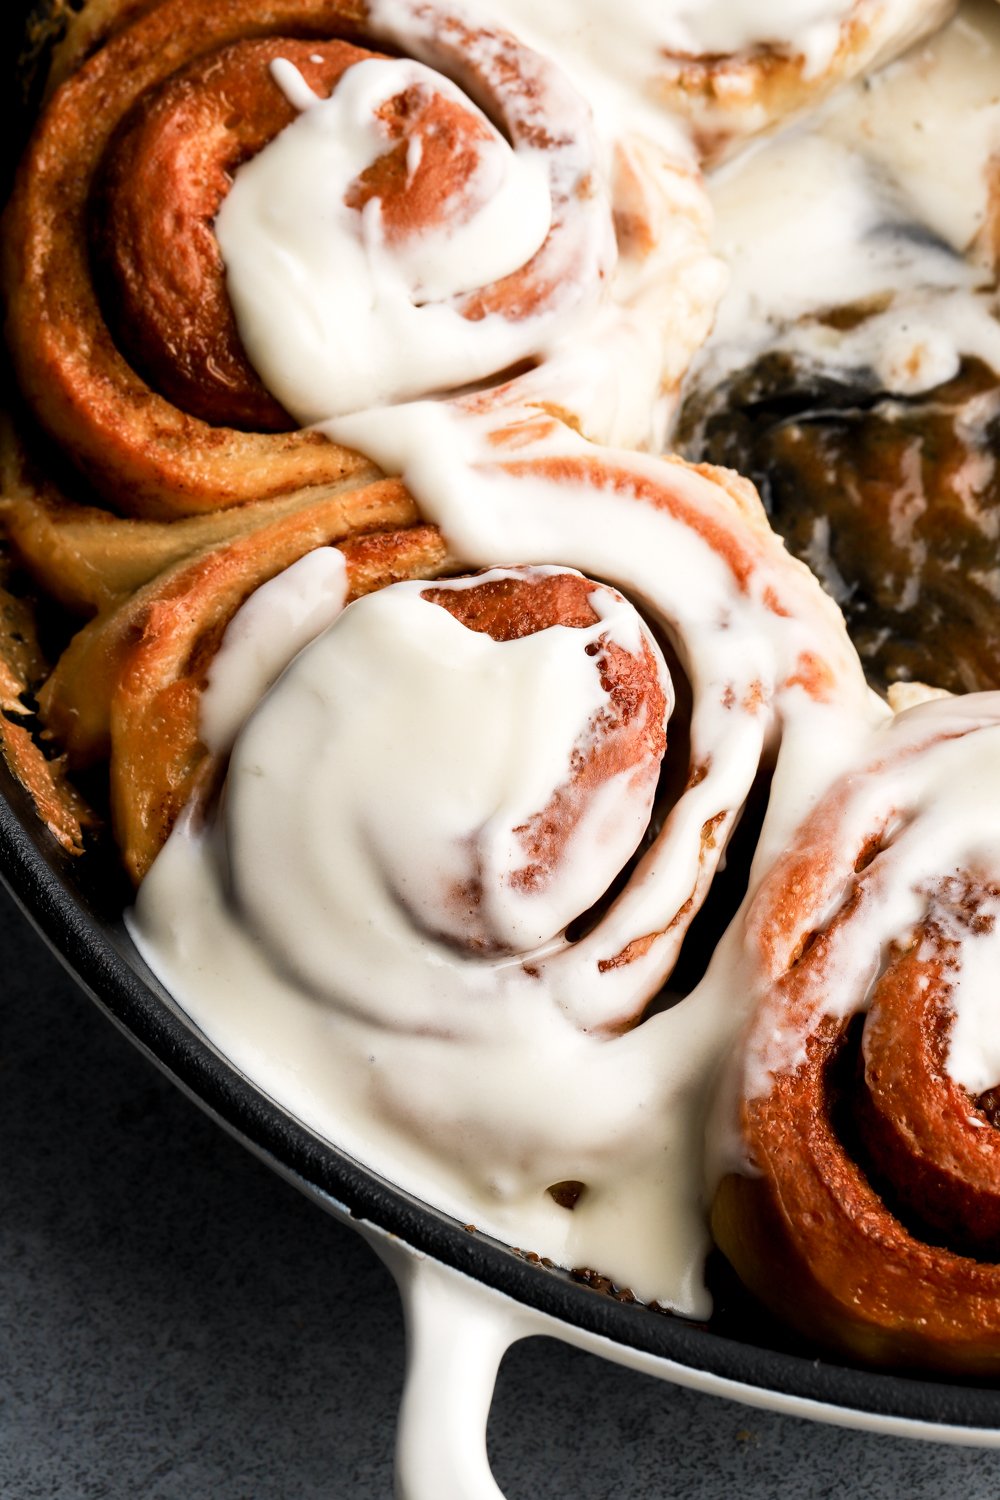
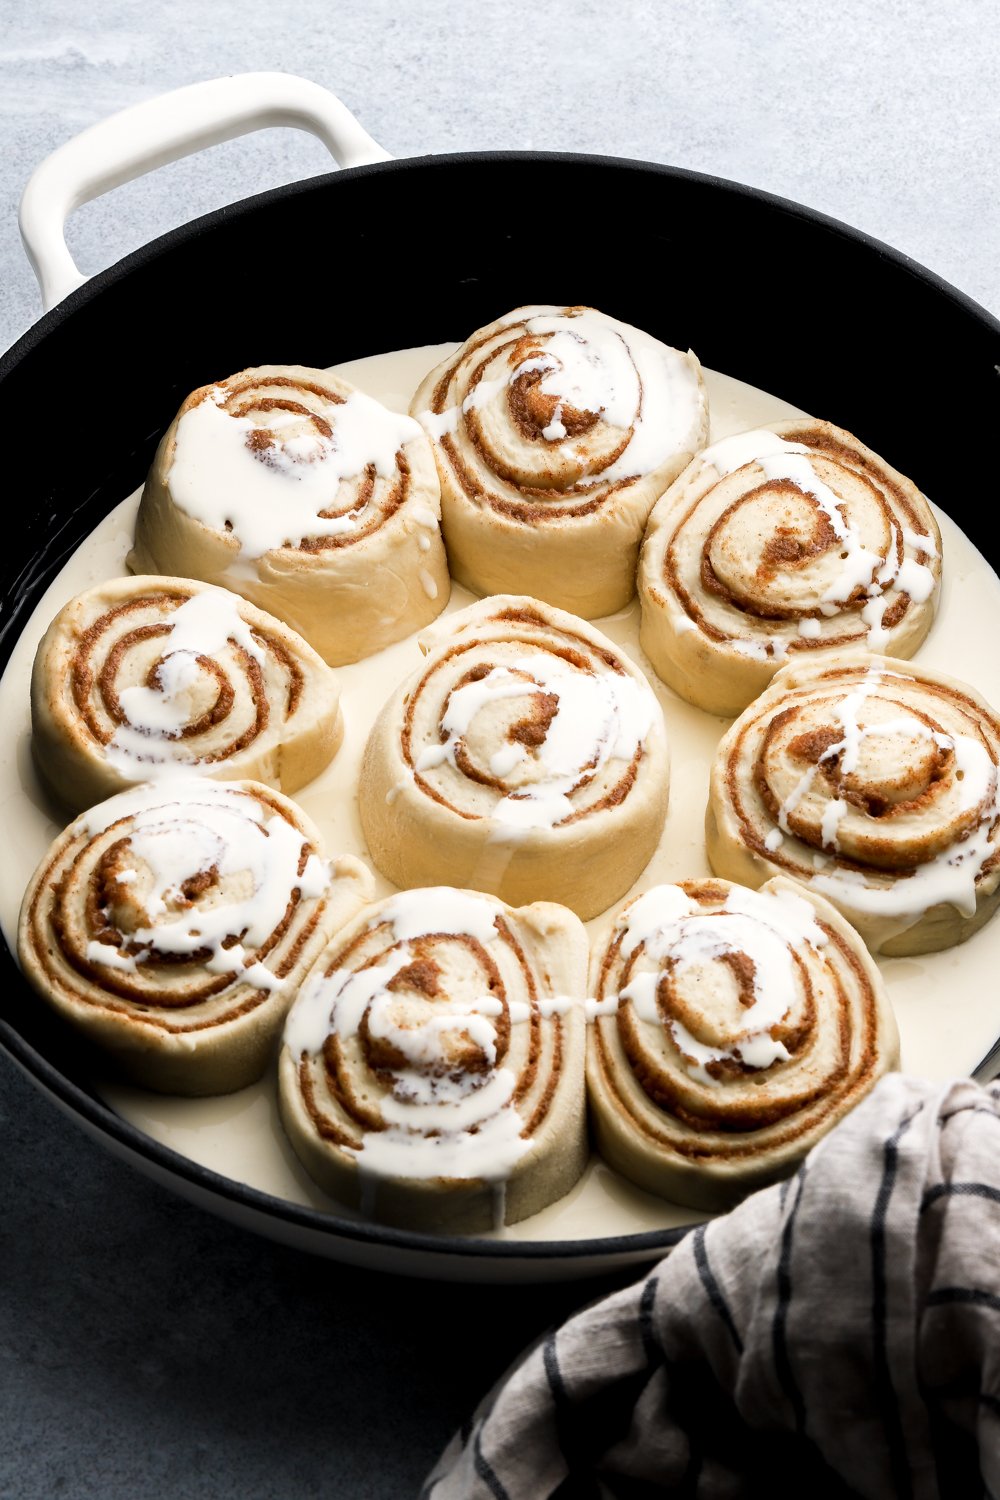
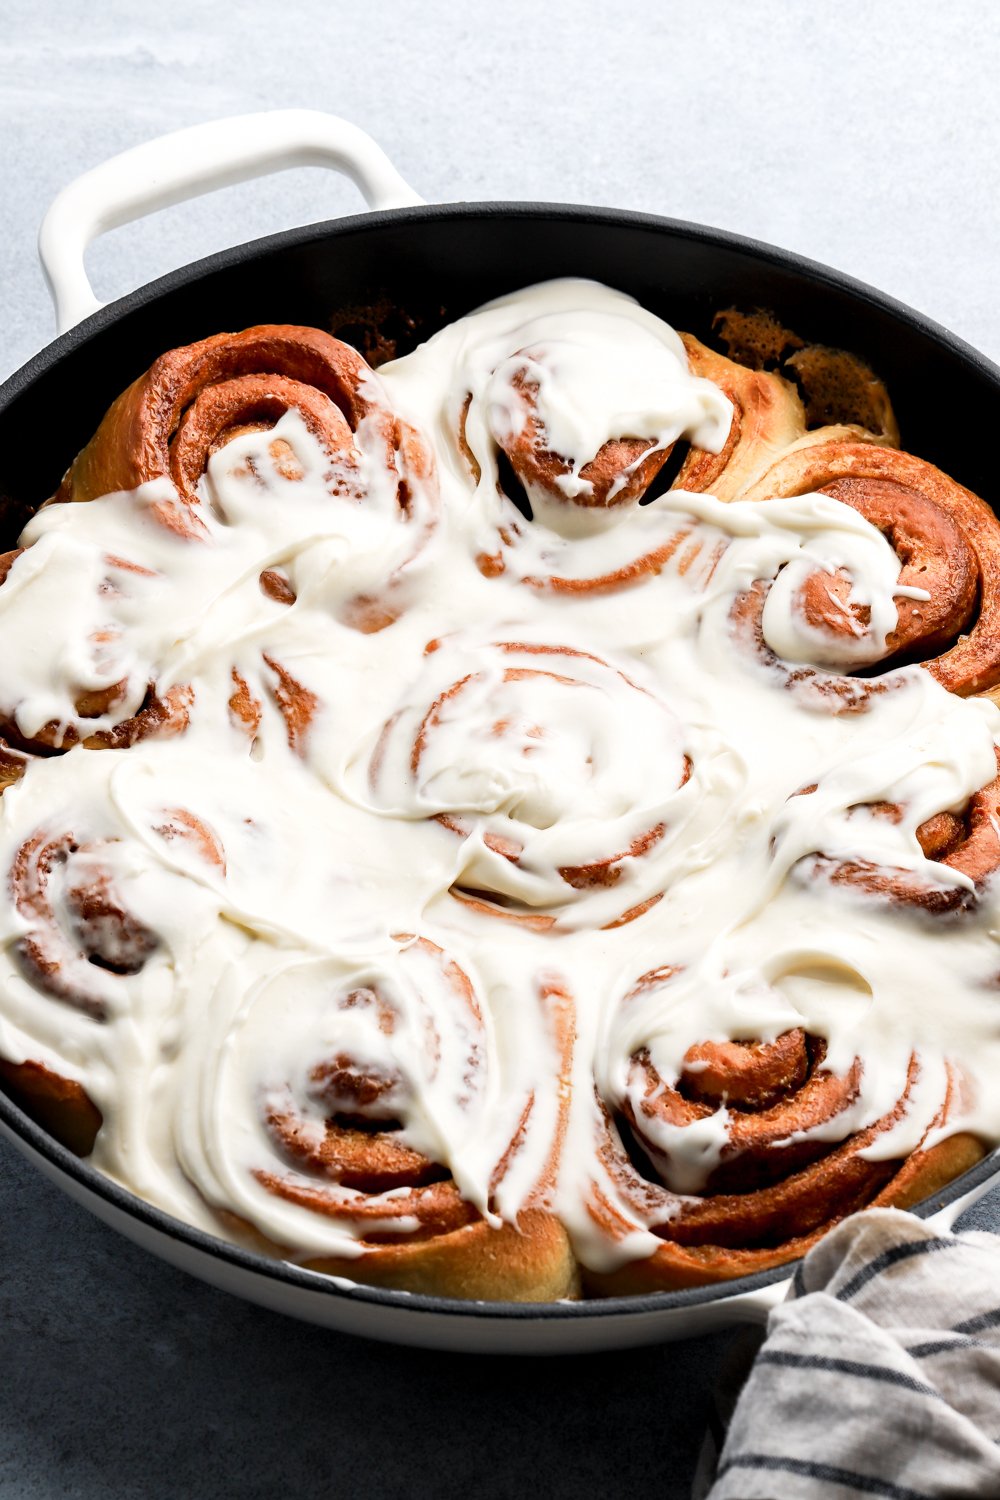
For a classic cinnamon roll, I recommend a soft frosting like I have here. It’s made with half cream cheese, half butter but has less sugar than traditional frosting so it’s a little softer than something you’d want to frost a cake with.
I like that it’s very opaque so it’s a nice contrasting color to the cinnamon rolls and because it’s a thicker consistency, it melts beautifully on the cinnamon roll without completely disappearing and melting into it.
The key to this frosting is using room temperature butter and cream cheese so it’s not too runny. Cream it with the powdered sugar (I use about half the sugar from traditional American buttercream or cream cheese frosting). Then add the heavy cream or milk, vanilla and a tiny pinch of salt.
I like to wait about 15-25 minutes for the cinnamon rolls to finish baking as they’re cooling in the pan. Then cover the whole thing in frosting while it’s warm. This will let the frosting melt into all the little crevices so you’ll never have a dry bite of cinnamon roll.

How to store brioche cinnamon rolls
Cinnamon rolls are best served fresh and warm. If they’re not served immediately, it’s best to reserve the frosting and frost them before serving.
The rolls can stay in an airtight container at room temperature for 1-2 days (unfrosted) and refrigerated for up to a week. When serving cinnamon rolls, reheat them in the microwave or the oven just until they’re warm and then frost.
If they are frosted and not eaten right away, refrigerate them and reheat them before serving, keeping in mind the frosting will melt and probably look separated but it will still taste good.
I recommend microwaving to reheat them or bake at a low temperature and keep an eye on it. I once placed them back in the oven at 350F after refrigerating over night with the frosting and the frosting kind of toasted on there LOL it was like crisp on top and not pleasant so now I just use the microwave.
If you’ve made it this far, I apologize for the length but I hope this post is helpful to make the absolute best homemade cinnamon rolls!
If you have any questions, make sure to leave it in the comment section below.
If you love this recipe, please leave a five star review and if you don’t, then please let me know why! 🙂
Love, B